Difference between revisions of "Codemeter Enable Logging"
Jump to navigation
Jump to search
| Line 20: | Line 20: | ||
<li>By default, CodeMeter will create .log files in "C:\ProgramData\CodeMeter\Logs". A log file record all the access history between a network server and clients. It also records error messages if an access is denied.</li> | <li>By default, CodeMeter will create .log files in "C:\ProgramData\CodeMeter\Logs". A log file record all the access history between a network server and clients. It also records error messages if an access is denied.</li> | ||
[[File:Codemeter_Enable_Logging_02.png|800px]] | [[File:Codemeter_Enable_Logging_02.png|800px]] | ||
| − | <br> | + | <br><br> |
| − | Please note that logging | + | Please note that logging is compatible for computers with Local Only, Network Only and a combination of Local and Network Licensing enabled. |
</ol> | </ol> | ||
<br> | <br> | ||
Revision as of 18:23, 9 April 2018
Introduction
By default Codemeter will log events, such as when TUFLOW licenses are being used and when they are returned to the dongle. This information can be viewed both via the Codemeter events tab and within the output produced by the cmDust utility. Both of the these logs however are limited in the history of information they can provide.
This page contains instructions for enabling "Logging" and "License Tracking" in CodeMeter Control Centre. These are useful functionalities that can be used to check and monitor the licence allocation by CodeMeter over an extended period of time.
Turn On Logging
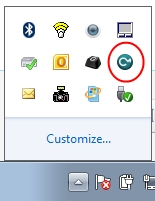
- Open the CodeMeter Control Centre. This can be done via the icon on the taskbar:
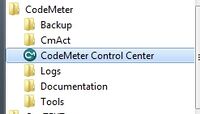
Or via the start menu:
- Go to "File" and check "Logging".
- Restart CodeMeter.
- By default, CodeMeter will create .log files in "C:\ProgramData\CodeMeter\Logs". A log file record all the access history between a network server and clients. It also records error messages if an access is denied.


Please note that logging is compatible for computers with Local Only, Network Only and a combination of Local and Network Licensing enabled.
Turn On Licence Tracking for a Network Server
-
Please note that License Tracking to work you will need to have a valid TUFLOW Network License and Codemeter also needs to be Server configured.
To turn on license tracking you need to update a variable within the Windows Registry.
- To do so type "regedit" in windows search bar and start up Registry Editor:
- Navigate to "Computer\HKEY_LOCAL_MACHINE\SOFTWARE\WIBU-SYSTEMS\CodeMeter\Server\CurrentVersion". Double click the variable "LogLicenseTracking", or right click and "Modify". In the pop-up window, change the the Value data to "1"
- Restart CodeMeter.
- To view Licence Tracking, open CodeMeter "WebAdmin". Go to "License Monitoring" -> "License Tracking", select "Firm Code", "logging period" and "license" type. The number of used licenses will be shown as a bar graph. If any license request has been rejected during the selected period, they will be shown as red bars.
- Click the bar to see the breakdown of the license useage.
- More details are presented below the bar graph, including the lists of "Active User", "Rejected Requests" and "All Events".


By using these handy tools we hope it helps you to better understand your network license usage and assists license usage debugging. If you have any further questions please get in contact with us at support@tuflow.com Click the following link to head back to the Wiki Home Page