Tute Arc M01 Create Project ArcTUFLOW
Introduction
A toolbox is available for Arc Map 10.1 and newer, this toolbox helps with streamlining the process of creating and editing a TUFLOW model in ArcMap. This utility can be downloaded from the TUFLOW website:
http://www.tuflow.com/Tuflow%20Utilities.aspx
Before starting this page you will need to download the utility from the link above and load this into ArcMap. To load the utility please see the instructions here: Loading the ArcTUFLOW Utility.
In this page we will use the ArcTUFLOW toolbox to create a TUFLOW project for the TUFLOW tutorial module 1.
This will perform the following steps:
- Create TUFLOW folder structure
- Write Shapefile in model projection
- Create TUFLOW simulation file for writing template files
- Optionally Run TUFLOW to generate empty (template) files
Method
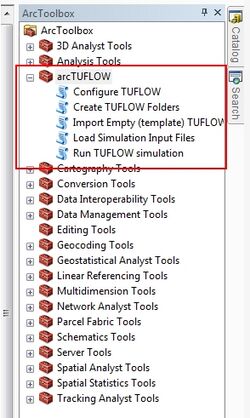
- Ensure that ArcTUFLOW toolbox loaded open, this is accessed from the Arc Toolbox dialogue:
- Open the DEM and Aerial Photo from the module data.
- Save a map document.
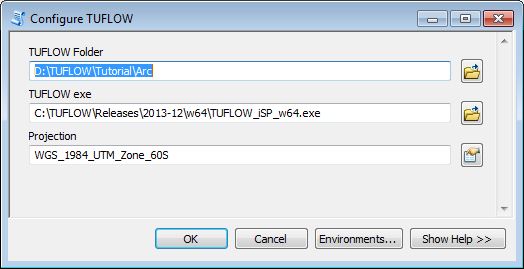
- Open the Configure TUFLOW tool from the ArcTUFLOW toolbox. This tool will save the TUFLOW folder location, TUFLOW executable and model projection for use in later stages.
- Set the parent folder. This will contain the TUFLOW directory. For example if this is set as C:\Training\TUFLOW_Tutorial\ when the folder structure is created a TUFLOW directory structure will be created in this folder e.g. C:\Training\TUFLOW_Tutorial\TUFLOW.
- Set the path to the TUFLOW executable you wish to use. For the tutorial, this should be the latest version downloaded from the TUFLOW website. You will note that two versions iSP and iDP are included in the download. The difference is in the model precision, this is discussed in the FAQ (single and double precision). For the tutorial module 1, the single precision (iSP) version is sufficient.
- Set the model projection. The model projection is WGS 1984 UTM Zone 60S. This can be found be navigating through the Projection Coordinate Systems >> UTM >> WGS 1984 >> Southern Hemisphere or by typing WGS 1984 UTM Zone 60S into the filter box at the top of the dialogue.
- Once the dialogue box has been completed, hit OK. This will save the settings into the map document (.mxd). This will mean these are available for all TUFLOW utilities used from the map document.
- The next step is to create the TUFLOW folders. This can be done with the Create TUFLOW Folders utility in the ArcTUFLOW toolbox. If the step above was comleted correctly, all the information shoudl already be filled in:
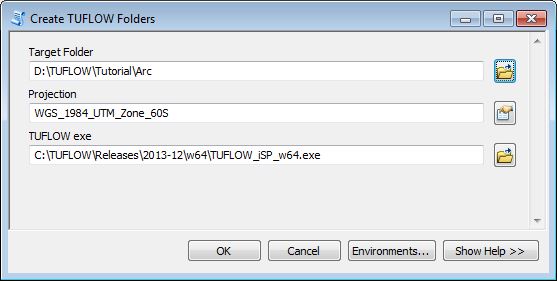
- Hit OK to create the folders and run TUFLOW. If successful, a TUFLOW window will be created and a message box that Empty Template GIS Files Created.
- The directory structure will have been created. This will be located in the parent folder, and will look like the following. The folders are as described in the main tutorial 1 page.
A projection file has been created (in the model\gis folder - TUFLOW\model\gis\Projection.prj). This contains an ArcMap projection file and all GIS files input / output from the model should have this projection.
A TUFLOW control file (TUFLOW\runs\Create_Empties.tcf) has been created. This contains the commands as outlined in the tutorial model page. A TUFLOW simulation has been started with the Create_Empties.tcf file as the input. This TUFLOW simulation has created a series of template files which has the correct projection and the correct attributes. Different input layers in TUFLOW require different attributes. For example a initial water level layer (2d_IWL_) only requires a single attribute (which is the initial water level value), whilst a 1d channel layer (1d_nwk_)has a number of attributes including channel type, upstream and downstream elevation.


Conclusion
The arcTUFLOW toolbox has been used to configure a TUFLOW project and create a series of template layers. The next step is to define the location and dimensions of the 2D model.