MI Import Mif: Difference between revisions
Created page with '=Introduction= This page details the process for importing MapInfo Interchange Format (.mif and .mid pair). The method is covered both for users with the miTools utilities and wi...' |
No edit summary |
||
| (4 intermediate revisions by the same user not shown) | |||
| Line 11: | Line 11: | ||
* Batch Import files |
* Batch Import files |
||
The export utilities are covered in the [[MI_Export_Mif | Export a .MIF/.MID]] page. |
|||
==Import a Single File== |
|||
To import a file select the third icon from the left (single red arrow pointing downward). This will open a file import dialogue (see below). Navigate to the folder and select the file you wish to import. If importing a table from the '''TUFLOW\Model\mi\Empty\''' the utility will automatically navigate up one level to save the table in the '''TUFLOW\Model\mi\''' folder. Set the file name and select ''Open''.<br> |
|||
The utility automatically add the newly created table to the ''Layer Control'' as the top file and sets it to be ''Editable''.<br> |
|||
[[File:MiTools ImportSingle.png|600px]] |
|||
<br><br> |
|||
== Import Multiple Files== |
|||
To import multiple files, select the final ''Batch Import'' icon (two red arrows pointing down). Navigate to the directory that you wish to import from and select <u>any file (only one)</u> and select ''Open'' (see 1st image below). This will open second dialogue box (2nd image below), in this dialogue you can select multiple files to be imported using the ''Control'' and ''Shift'' keys.<br> |
|||
[[File:MiTools MultiImport1.png|600px]] |
|||
<br> |
|||
[[File:MiTools MultiImport2.png|600px]] |
|||
<br> |
|||
=Without miTools= |
=Without miTools= |
||
Select ''Table >> Import'' and navigate to the .mif file that you want to import and select ''OPEN''. Navigate to the folder you wish to save the MapInfo table to and choose a file name and select ''Save''. If importing a table from the '''TUFLOW\Model\mi\Empty\''' ensure that you navigate up one level to the '''TUFLOW\Model\mi\'''.<br> |
|||
After importing the file, it will be needed to be added to the ''Layer Control'' to be made visible and/or editable.<br> |
|||
For multiple file imports the process needs to be repeated.<br> |
|||
{{Tips Navigation |
|||
|uplink=[[MapInfo_Tips | Back to MapInfo Tips And Tricks]] |
|||
}} |
|||
Latest revision as of 15:29, 9 September 2011
Introduction
This page details the process for importing MapInfo Interchange Format (.mif and .mid pair). The method is covered both for users with the miTools utilities and without these utilities.
With miTools
There are a number of utilities for the importing and exporting of tables into the MIF / MID (MapInfo Interchange Format) which are used by TUFLOW.
![]()
The four buttons from left to right are:
- Batch Export files
- Export currently editable file to .MIF
- Import MIF file to current map
- Batch Import files
The export utilities are covered in the Export a .MIF/.MID page.
Import a Single File
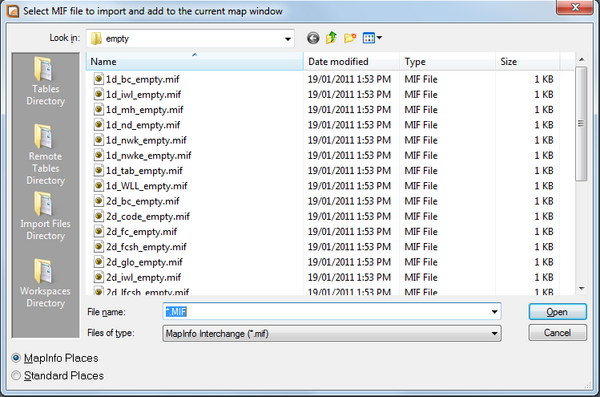
To import a file select the third icon from the left (single red arrow pointing downward). This will open a file import dialogue (see below). Navigate to the folder and select the file you wish to import. If importing a table from the TUFLOW\Model\mi\Empty\ the utility will automatically navigate up one level to save the table in the TUFLOW\Model\mi\ folder. Set the file name and select Open.
The utility automatically add the newly created table to the Layer Control as the top file and sets it to be Editable.

Import Multiple Files
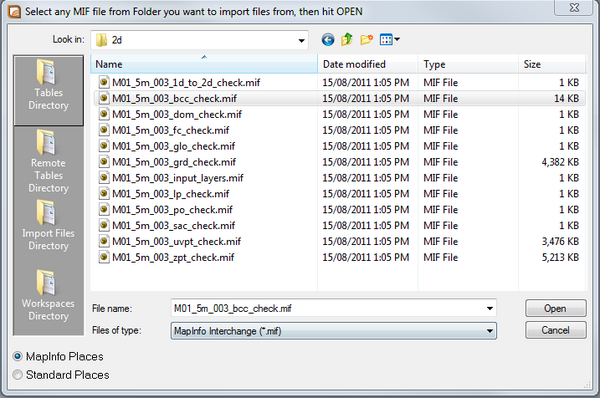
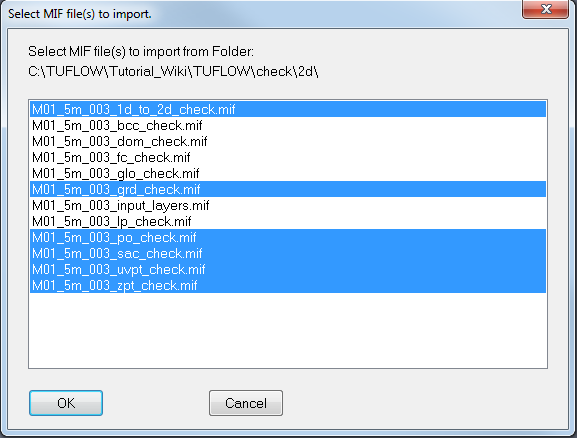
To import multiple files, select the final Batch Import icon (two red arrows pointing down). Navigate to the directory that you wish to import from and select any file (only one) and select Open (see 1st image below). This will open second dialogue box (2nd image below), in this dialogue you can select multiple files to be imported using the Control and Shift keys.
Without miTools
Select Table >> Import and navigate to the .mif file that you want to import and select OPEN. Navigate to the folder you wish to save the MapInfo table to and choose a file name and select Save. If importing a table from the TUFLOW\Model\mi\Empty\ ensure that you navigate up one level to the TUFLOW\Model\mi\.
After importing the file, it will be needed to be added to the Layer Control to be made visible and/or editable.
For multiple file imports the process needs to be repeated.
| Up |
|---|

