Difference between revisions of "QGIS Intallation with OSGeo4W"
Jump to navigation
Jump to search
Ellis Symons (talk | contribs) |
(→Installation Steps: The website changed and wanted this reflected) |
||
| (13 intermediate revisions by 3 users not shown) | |||
| Line 2: | Line 2: | ||
<ol> | <ol> | ||
<li> Download OSGeo4W setup installer | <li> Download OSGeo4W setup installer | ||
| − | : [https://qgis.org/en/site/forusers/download.html https://qgis.org/en/site/forusers/download.html]<br> | + | :[https://qgis.org/en/site/forusers/download.html https://qgis.org/en/site/forusers/download.html]<br> |
| − | : [[File: | + | : [[File:Osgeo4w download network installer.png|alt=|873x873px]] |
<li> Run the downloaded EXE | <li> Run the downloaded EXE | ||
<li> Select '''Advanced Install''' | <li> Select '''Advanced Install''' | ||
| Line 19: | Line 19: | ||
<li> Use the search bar to search for "QGIS". Expand the '''Desktop''' dropdown and find "qgis: QGIS Desktop" under the '''package''' column. Left-click the "skip" text and the text will change to the latest version number. Once the verseion number is showing, this will be the version installed when you proceed. If you left-click again, the version number may change again to the previous version. If you keep left-clicking it will cycle back to "skip". (Note: you could also choose the "qgis-ltr: QGIS Desktop (long term release)" instead, and this would install the long term release version). | <li> Use the search bar to search for "QGIS". Expand the '''Desktop''' dropdown and find "qgis: QGIS Desktop" under the '''package''' column. Left-click the "skip" text and the text will change to the latest version number. Once the verseion number is showing, this will be the version installed when you proceed. If you left-click again, the version number may change again to the previous version. If you keep left-clicking it will cycle back to "skip". (Note: you could also choose the "qgis-ltr: QGIS Desktop (long term release)" instead, and this would install the long term release version). | ||
: [[File: osgeo4w_installation_7.PNG]] | : [[File: osgeo4w_installation_7.PNG]] | ||
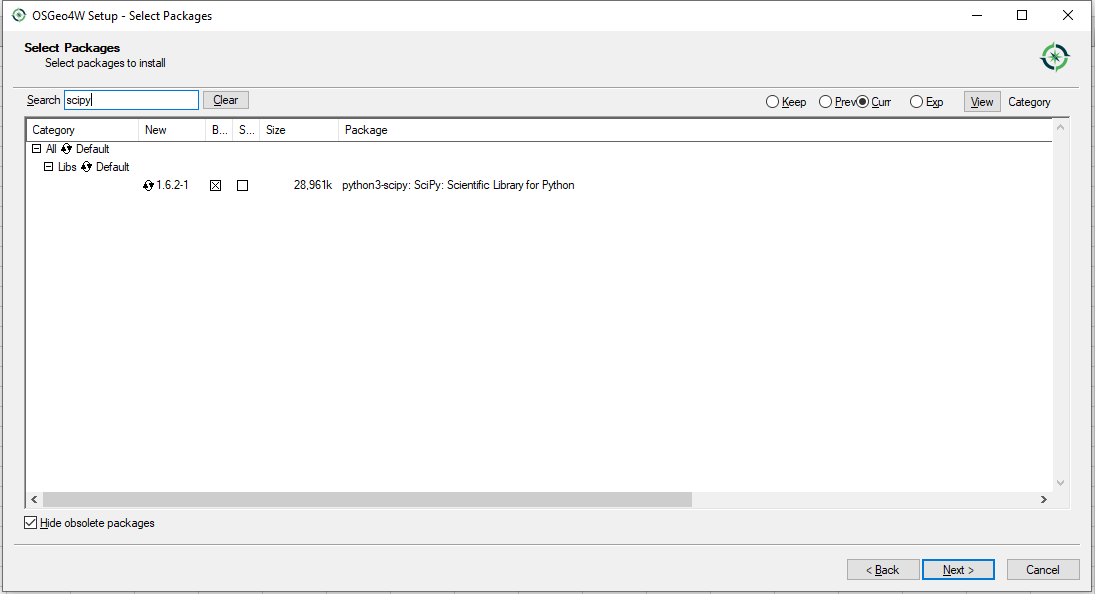
| − | <li> The installation also requires manually choosing several Python libraries. | + | <li> The installation also requires manually choosing several Python libraries. Use the search bar again and search for "scipy". Expand the '''Libs''' dropdown and find "python3-scipy". Left-click the "skip" text once to choose the latest scipy library version. |
| − | : [File: osgeo4w_installation_8.PNG]] | + | : [[File: osgeo4w_installation_8.PNG]] |
| − | <li> | + | <li> The following libraries should be added: |
| + | * scipy | ||
* matplotlib | * matplotlib | ||
* netcdf4 | * netcdf4 | ||
| − | * pandas (this may return 2 options - make sure to select "python3-pandas" | + | * pandas (this may return 2 options - make sure to select "python3-pandas") |
| + | * fiona | ||
| + | * geopandas | ||
| + | * rtree | ||
| + | * shapely | ||
<li> Click '''Next''' | <li> Click '''Next''' | ||
<li> Continue to work through the steps of the installation process - the installer will ask you to also install a number of dependencies (make sure to click yes to these) and prompt for license agreements | <li> Continue to work through the steps of the installation process - the installer will ask you to also install a number of dependencies (make sure to click yes to these) and prompt for license agreements | ||
| Line 34: | Line 39: | ||
<ol> | <ol> | ||
<li> As part of the installation, OSGeo4W should install a program called "setup" which you can search in the Windows start bar. You can also run the downloaded OSGeo4W installer again (they are the same). | <li> As part of the installation, OSGeo4W should install a program called "setup" which you can search in the Windows start bar. You can also run the downloaded OSGeo4W installer again (they are the same). | ||
| − | <li> Once running the setup simply continue clicking '''Next'''. The setup should remember all your previous settings and automatically choose the latest version of the installed libraries at the '''Packages Selection''' stage of the installation | + | <li> Once running the setup, simply continue clicking '''Next'''. The setup should remember all your previous settings and automatically choose the latest version of the installed libraries at the '''Packages Selection''' stage of the installation |
</ol> | </ol> | ||
| + | <Br> | ||
==Upgrading Silently== | ==Upgrading Silently== | ||
| − | It's possible to upgrade silently | + | It's possible to upgrade silently from the Windows CMD prompt or from a batch file.<Br> |
| + | <Br> | ||
| + | ===From CMD=== | ||
| + | <ol> | ||
| + | <li> Search "osgeo4w" in the Windows start bar and choose '''OSGeo4W Shell''' | ||
| + | <li> Type the following command and press enter | ||
| + | <pre>setup -q -g</pre> | ||
| + | : <tt>"-q"</tt> : quiet installation flag | ||
| + | : <tt>"-g"</tt> : upgrade installed packages flag | ||
| + | </ol> | ||
| + | <Br> | ||
| + | ===From BAT=== | ||
| + | <ol> | ||
| + | <li> In the OSGeo4W installation folder under the "bin" folder find the following batch file "o4w_env.bat" (e.g. "C:\OSGeo4W\bin\o4w_env.bat"). | ||
| + | <li> In your batch file call the "o4w_env.bat" file | ||
| + | <li> On the next line, type "setup -q -g" | ||
| + | : <tt>"-q"</tt> : quiet installation flag | ||
| + | : <tt>"-g"</tt> : upgrade installed packages flag | ||
| + | <li> Your final batch file should look like the below with the path to "o4w_env.bat" customised to match your installation | ||
| + | <pre> | ||
| + | call C:\OSGeo4W\bin\o4w_env.bat | ||
| + | setup -q -g | ||
| + | </pre> | ||
| + | <li> Run the batch file | ||
| + | </ol> | ||
| + | <br> | ||
| + | <br> | ||
| + | {{Tips Navigation | ||
| + | |uplink=[[QGIS_Tips| Back to QGIS Tips page]] | ||
| + | }} | ||
Latest revision as of 01:44, 8 November 2024
Installation Steps
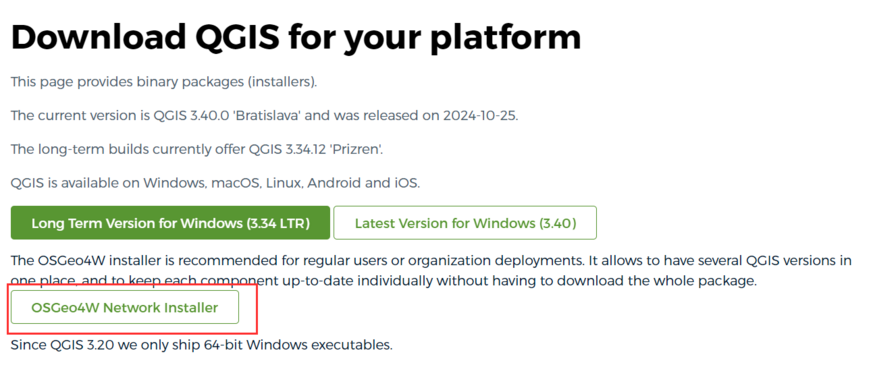
- Download OSGeo4W setup installer
- Run the downloaded EXE
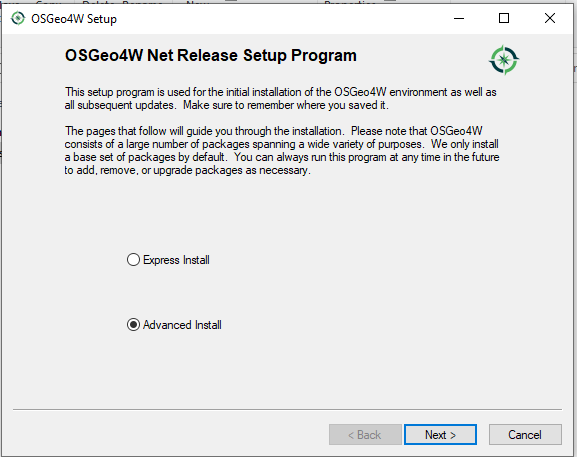
- Select Advanced Install
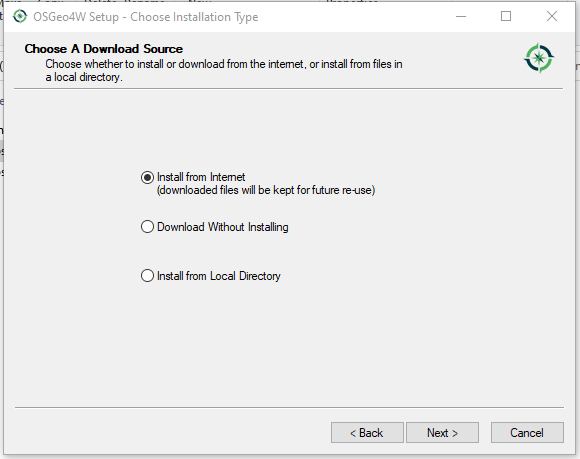
- Select Install from Internet
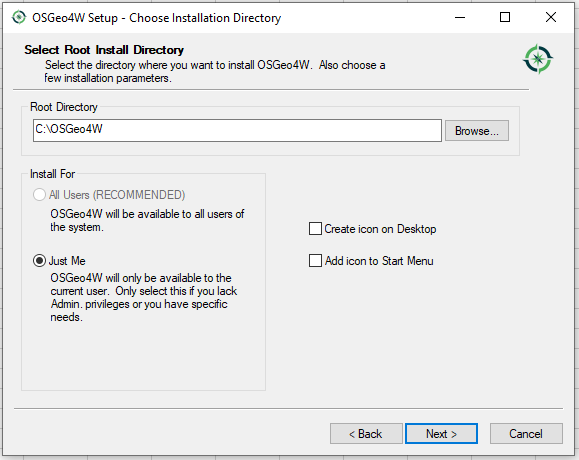
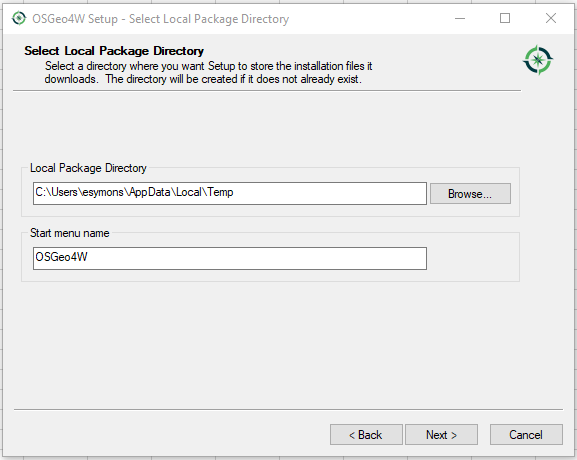
- Select a directory and other installation options (Note some options may require admininstrator rights)
- Click Next
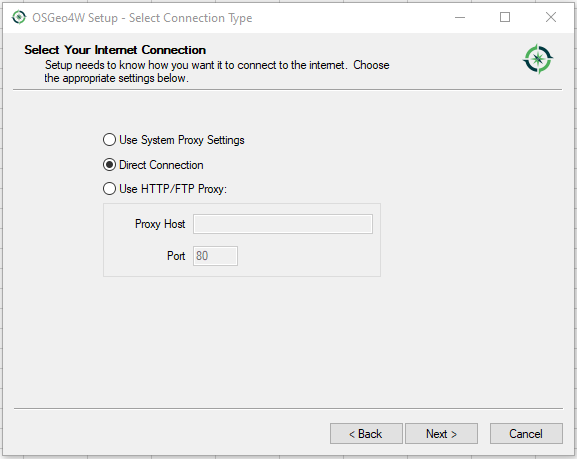
- Select Direct Connection (Note some firewall systems will require proxy settings)
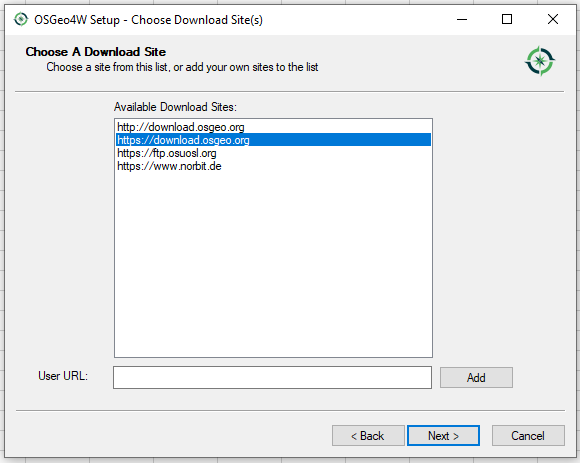
- Select a download site. It is recommended to use with one with an SSL certificate (i.e. starts with https://)
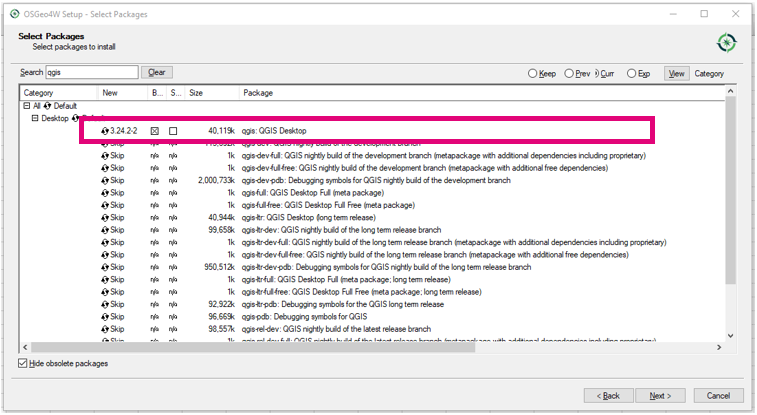
- Use the search bar to search for "QGIS". Expand the Desktop dropdown and find "qgis: QGIS Desktop" under the package column. Left-click the "skip" text and the text will change to the latest version number. Once the verseion number is showing, this will be the version installed when you proceed. If you left-click again, the version number may change again to the previous version. If you keep left-clicking it will cycle back to "skip". (Note: you could also choose the "qgis-ltr: QGIS Desktop (long term release)" instead, and this would install the long term release version).
- The installation also requires manually choosing several Python libraries. Use the search bar again and search for "scipy". Expand the Libs dropdown and find "python3-scipy". Left-click the "skip" text once to choose the latest scipy library version.
- The following libraries should be added:
- scipy
- matplotlib
- netcdf4
- pandas (this may return 2 options - make sure to select "python3-pandas")
- fiona
- geopandas
- rtree
- shapely
- Click Next
- Continue to work through the steps of the installation process - the installer will ask you to also install a number of dependencies (make sure to click yes to these) and prompt for license agreements
- Once installed, QGIS should be installed in the location specified in an earlier step
Upgrading Steps
- As part of the installation, OSGeo4W should install a program called "setup" which you can search in the Windows start bar. You can also run the downloaded OSGeo4W installer again (they are the same).
- Once running the setup, simply continue clicking Next. The setup should remember all your previous settings and automatically choose the latest version of the installed libraries at the Packages Selection stage of the installation
Upgrading Silently
It's possible to upgrade silently from the Windows CMD prompt or from a batch file.
From CMD
- Search "osgeo4w" in the Windows start bar and choose OSGeo4W Shell
- Type the following command and press enter
setup -q -g
- "-q" : quiet installation flag
- "-g" : upgrade installed packages flag
From BAT
- In the OSGeo4W installation folder under the "bin" folder find the following batch file "o4w_env.bat" (e.g. "C:\OSGeo4W\bin\o4w_env.bat").
- In your batch file call the "o4w_env.bat" file
- On the next line, type "setup -q -g"
- "-q" : quiet installation flag
- "-g" : upgrade installed packages flag
- Your final batch file should look like the below with the path to "o4w_env.bat" customised to match your installation
call C:\OSGeo4W\bin\o4w_env.bat
setup -q -g
- Run the batch file
| Up |
|---|
