SMS 3D Animation: Difference between revisions
Jump to navigation
Jump to search
Content deleted Content added
No edit summary |
Chris Huxley (talk | contribs) |
||
| (3 intermediate revisions by 3 users not shown) | |||
| Line 58: | Line 58: | ||
<li>Finalise your map view by customising the ''Display Options >> 2D Mesh >>'' '''Contours''' tab display options and legend, together with your angle of view using the Rotate tool. It's a good idea to step through your 2D results timesteps to ensure you're happy with how the animation will appear.</li> |
<li>Finalise your map view by customising the ''Display Options >> 2D Mesh >>'' '''Contours''' tab display options and legend, together with your angle of view using the Rotate tool. It's a good idea to step through your 2D results timesteps to ensure you're happy with how the animation will appear.</li> |
||
<li>You're now ready to create the animation. Open the ''Data >> Film Loop'' menu to create the animation. If you're unsure about this, you may follow the steps provided in the Animations section of the <u>[[SMS_Tips#Animations | SMS Tips]]</u> page.</li> |
<li>You're now ready to create the animation. Open the ''Data >> Film Loop'' menu to create the animation. If you're unsure about this, you may follow the steps provided in the Animations section of the <u>[[SMS_Tips#Animations | SMS Tips]]</u> page.</li> |
||
<li>The vertical scale of the 3D display can be amplified within Display Options>>General>>Drawing Options>>'Uncheck' Auto z-mag>>'Set' Z magnification </li> |
|||
[[File:Functional_Surface_Example_001.PNG|600px]]<br> |
|||
<li>You may create animations using any view that you wish, depending on any particular features in your results that you wish to show.<br> |
<li>You may create animations using any view that you wish, depending on any particular features in your results that you wish to show.<br> |
||
<br> |
<br> |
||
[[File:SMS 3D AVI 10.png|600px]] |
[[File:SMS 3D AVI 10.png|600px]] |
||
[[File:SMS 3D AVI 11.png|600px]]</li> |
[[File:SMS 3D AVI 11.png|600px]]</li> |
||
</ol> |
|||
The SMS installation includes the avi |
The SMS installation includes the avi viewer "pavia.exe", this viewer allows the speed (frame rate) of the created animation to be set.<br> |
||
Have a play around with the various options, as there is too much to cover in this page! |
|||
Latest revision as of 05:42, 26 February 2015
- Digital Elevation Model/TIN;
- Aerial Photography; and
- 2D Model Results.
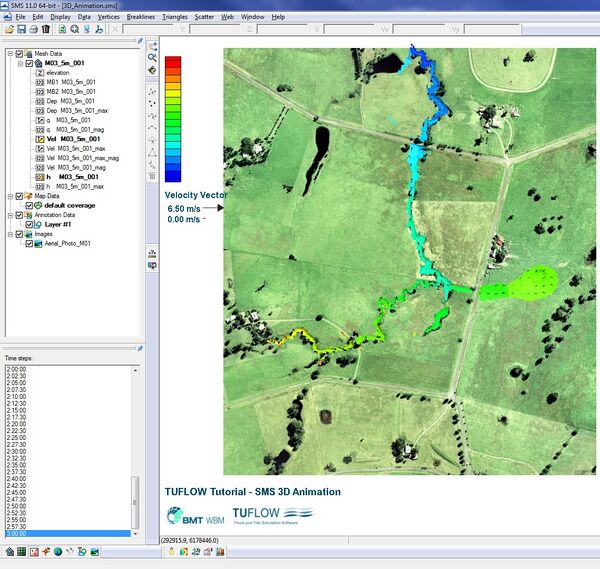
- Begin by opening in SMS the ground elevation (.2dm) and 2D results datasets using the M03_5m_001.ALL.sup results file located in the TUFLOW\results\M03\2d folder, together with the aerial photography Aerial_Photo_M01.jpg available in the Module_Data\Aerial_Photos\SMS folder.
SMS should now look something like this:
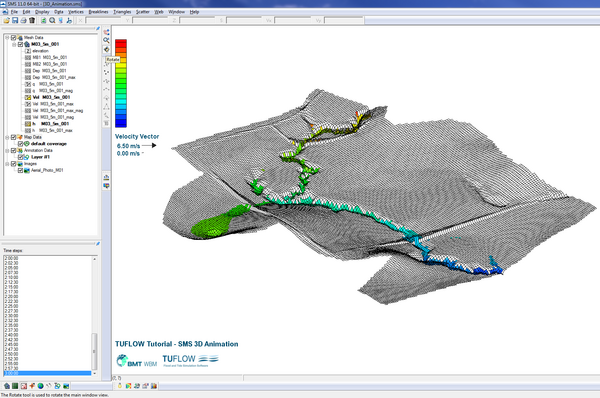
- To view the 2D mesh at a pseudo-3D oblique view, open the Display Options >> 2D Mesh window and check the Elements on. Using the Rotate tool
 you can drag the map view and change to an oblique view.
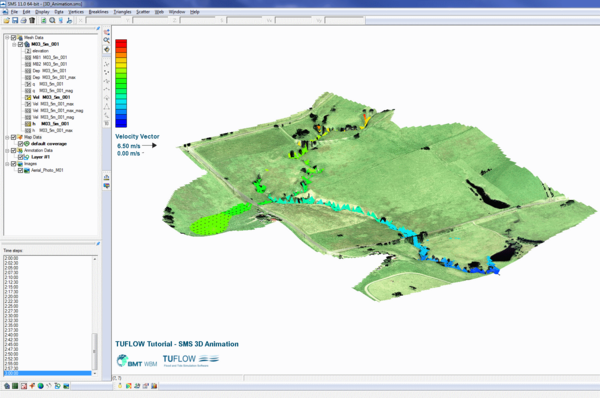
- Return to Display Options >> 2D Mesh and uncheck Elements. To display imagery draped over a 3D surface we need to turn on Texture Mapping. Go to Display Options >> General and select 2D Mesh under the Texture Mapping Display Location list.
Selecting 2D Mesh uses the TUFLOW model ground elevations contained in the .2dm file as the 3D surface over which imagery is draped. The Scatter Set option may be used to drape imagery over an active scatter set TIN.
The General options include the ability to exaggerate the Z axis scale by changing the Z magnification. Uncheck Auto z-mag and change the Z magnification to a factor of 5.0. Rotate the map view and SMS should now look something like this:
- Turning Contours on in the display options drapes the active dataset over the terrain. This can however look somewhat strange because an animation will show the water surface rising and falling according to the underlying terrain. A useful feature in SMS is to define one dataset as a functional surface, over which a second dataset other than the terrain may be draped. This allows, for example, water depth to be draped over the water surface rather than the terrain, giving a more realistic 3D impression of the water surface and varying depth.
To enable a functional surface, go to Display Options >> 2D Mesh, uncheck Contours, check Functional Surface and select Options. - Under Data Set, select User defined dataset and select your water surface (_h) dataset.
- Under Display Attributes, select Contour surface and check Specify separate dataset for contours and select your water depth (_d) dataset. This instructs SMS to drape the water depth contours over the water surface, which will provide a realistic view of the water surface and the depth of water above the terrain.
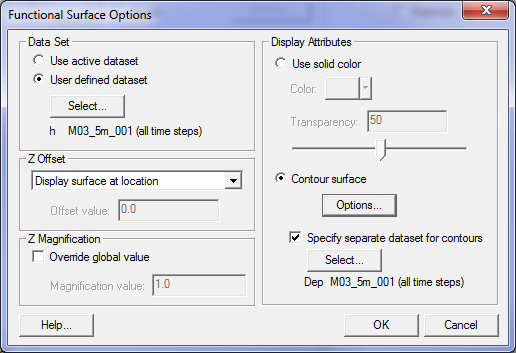
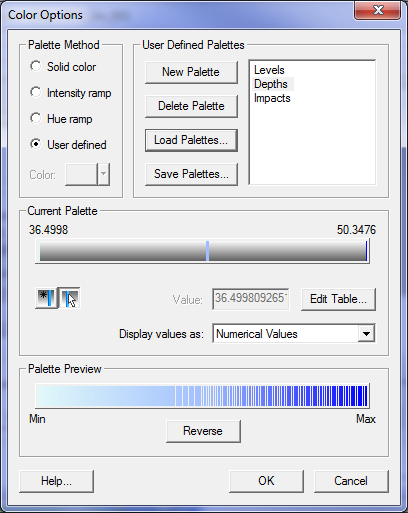
- Under Contour surface, select Options to view the Dataset Colour Options. Use this window to customise the display options of the water depth. This example makes use of SMS Palettes.pal colour palette available from the Downloads section of the TUFLOW website. Located in the Colour Ramp options, the Depths colour palette is loaded using the User defined method.
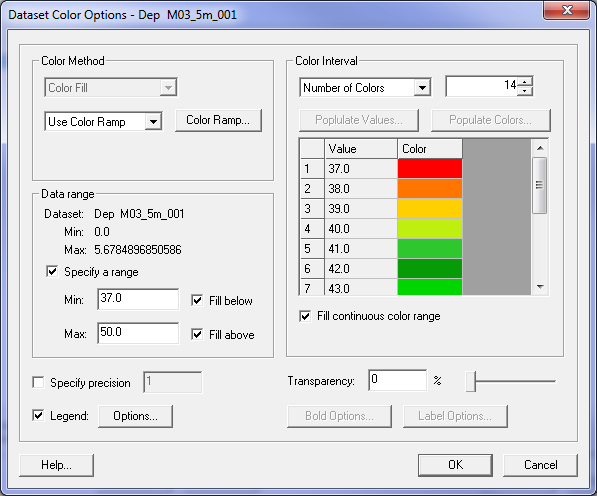
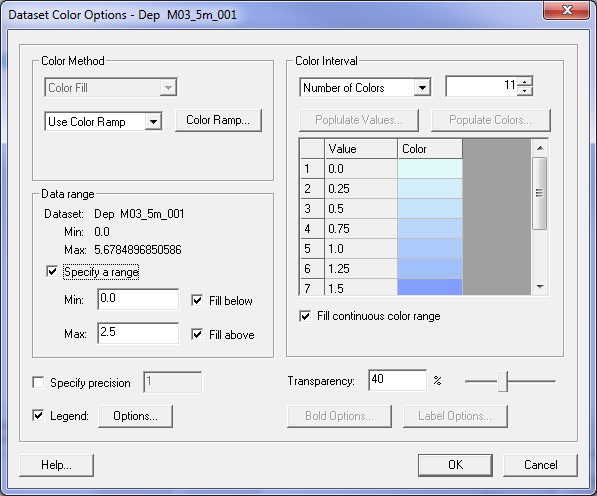
- Change the Colour Interval to the number of colours you'd like and check Specify a range that increases the colour range for overland (more shallow) flood depths. Enable transparency by changing the Transparency to 40%. If you haven't already, turn on Vectors in the Display Options >> 2D Mesh window.
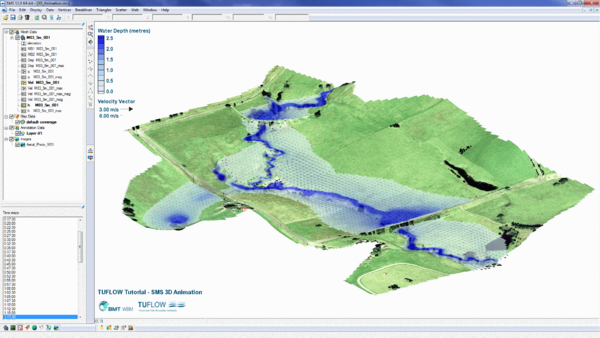
SMS should now look something like this:
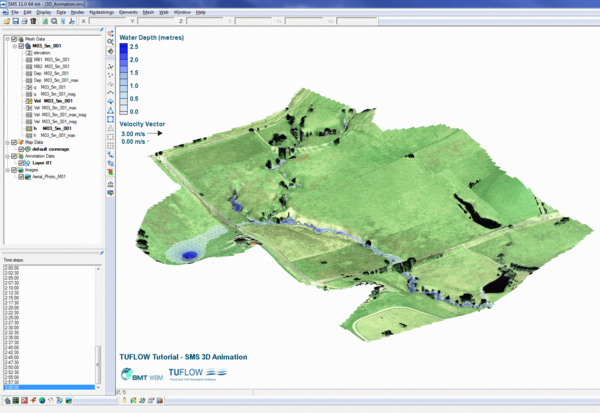
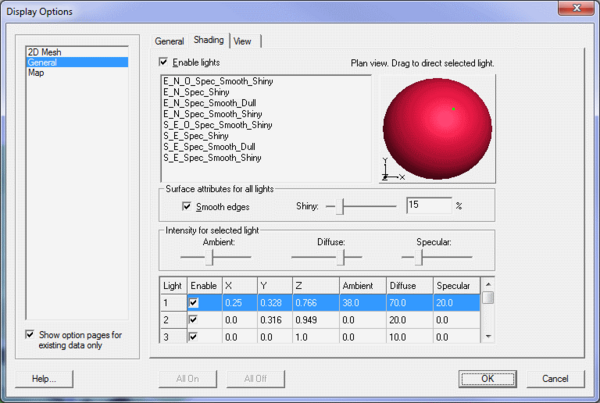
By using the functional surface option, the depth contours are now draped over the water surface and not the terrain. - Another option is to enable relief shading to emulate hill shade. If you wish to enable this option, you may do so under the Display Options >> General menu and Shading tab. Check Enable lights and configure the settings as you prefer.
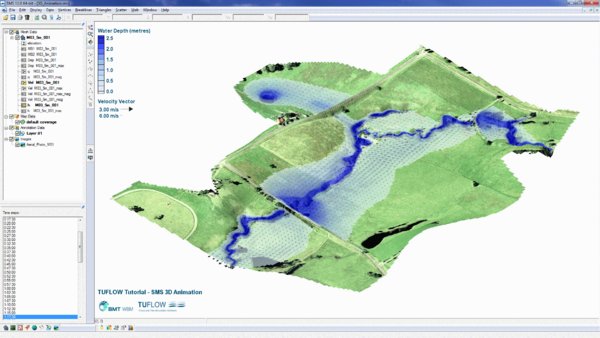
- Finalise your map view by customising the Display Options >> 2D Mesh >> Contours tab display options and legend, together with your angle of view using the Rotate tool. It's a good idea to step through your 2D results timesteps to ensure you're happy with how the animation will appear.
- You're now ready to create the animation. Open the Data >> Film Loop menu to create the animation. If you're unsure about this, you may follow the steps provided in the Animations section of the SMS Tips page.
- The vertical scale of the 3D display can be amplified within Display Options>>General>>Drawing Options>>'Uncheck' Auto z-mag>>'Set' Z magnification
- You may create animations using any view that you wish, depending on any particular features in your results that you wish to show.
 The SMS installation includes the avi viewer "pavia.exe", this viewer allows the speed (frame rate) of the created animation to be set.
Introduction
This page explains how to make a 3D animation using the SMS software. SMS version 11.0 has been used for this example, however good results can also be achieved using older versions of SMS. As a minimum you will need a licence for the SMS VIZ edition (see SMS pricing).
Data Required
As a minimum you will need:
Together with aerial photography, the 2D results for Tutorial Module 3 are used here. The complete model is available from the Downloads section of the TUFLOW website.
Creating a 3D Animation
The 2D results include the ground elevation (.2dm), water level (_h), depth (_d) and velocity (_v) datasets. The following steps may equally be followed using other datasets you may have.


Have a play around with the various options, as there is too much to cover in this page!