Ensight Data Loading: Difference between revisions
Chris Huxley (talk | contribs) Created page with "Run the TUFLOW utility RES_to_RES.exe to create the Ensight input data files from TUFLOW xmdf output.<br> Open the case file (*.case) in Ensight. File:Ensight_001.JPG|800p..." |
Chris Huxley (talk | contribs) No edit summary |
||
| (2 intermediate revisions by the same user not shown) | |||
| Line 1: | Line 1: | ||
Run the TUFLOW utility RES_to_RES.exe to create the Ensight input data files from TUFLOW xmdf output.<br> |
Run the TUFLOW utility RES_to_RES.exe to create the Ensight input data files from TUFLOW xmdf output. (See [[Ensight_Data_Preprocessing | Data Preprocessing]])<br> |
||
Open the case file (*.case) in Ensight. |
Open the case file (*.case) in Ensight. |
||
| Line 52: | Line 52: | ||
Time series controls are located above the Parts window (top left).<br> |
Time series controls are located above the Parts window (top left).<br> |
||
[[File:Ensight_008.JPG|400px]] |
[[File:Ensight_008.JPG|400px]] |
||
{{Tips Navigation |
|||
|uplink=[[Ensight_Tips | Back to Ensight]]}} |
|||
Latest revision as of 07:41, 18 February 2015
Run the TUFLOW utility RES_to_RES.exe to create the Ensight input data files from TUFLOW xmdf output. (See Data Preprocessing)
Open the case file (*.case) in Ensight.
This will load the 'Part' titled: 2D TUFLOW Elements as Case Item 1.
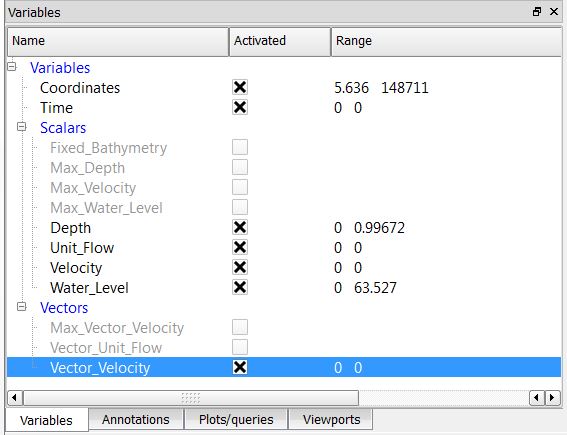
Select the "Variables" tab within the data management window (bottom left) to view the model result scalar and vector datasets that were loaded.
Activate the relevant dataset that you would like to work with. In this example we have selected, Depth, Unit Flow, Velocity and Water Level.
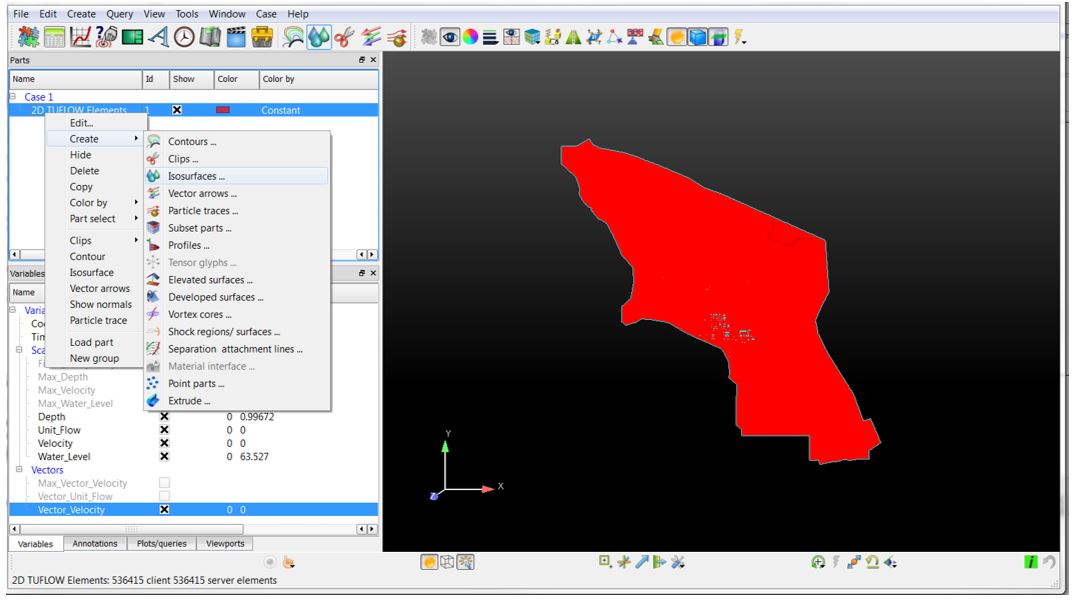
These results can be viewed by creating an isosurface of the dataset within the 2D TUFLOW Elements Case Item.
Right Click 2D TUFLOW Elements Select >> Create >> Isosurfaces
Within the isosurfaces window:
- Select 'Advance' (top right)
- Enter a unique name for the dataset. This will become the child Part name. (2D TUFLOW Elements is the parent Part title)
- Select the Variable you would like to visualize (e.g. Depth)
- Set Creation Type = Isovolume
- Set Constraint = Banded
- Define the isovolume range. The upper and lower extreme values for the datasets are listed within the variables table (bottom left of the interface)
Update the variable display contouring:
- Select the newly created Part (right click)
- Select Color by >> Select Variable
- When contouring, select the relevant maximum dataset. For example, for time varying Depth data, select Max_Depth. This will lock the contouring to the range of the maximum dataset. Block colors and transparencies can also be defined using this selection.
The colour palette can be modified by selecting the defining dataset within the variable list:
Right Click >> Edit Palette
The final visualization step requires that the parent Part, 2D TUFLOW Elements be flattened. Ensight is a 3D computational fluid dynamics viewing software. Flattening the parent Part locks the TUFLOW dataset to a fixed horizontal plan (2D space).
- Select the parent Part, 2D TUFLOW Elements (right click)
- Select Edit
- Set the Coordinates scale factor = -1 *variable
- Set the Z variable = Fixed_Bathymetry. For this option to be available, the model result data type ZH must be defined as a TUFLOW output (eg. Map Output Data Types == h v q d ZH
Time series controls are located above the Parts window (top left).

| Up |
|---|

