Getting Setup With GDAL Manually: Difference between revisions
Jump to navigation
Jump to search
Content deleted Content added
Ellis Symons (talk | contribs) No edit summary |
Ellis Symons (talk | contribs) |
||
| Line 17: | Line 17: | ||
<ol> |
<ol> |
||
<li> Unzip the downloaded file into a location of your choice. For the examples below, it will be assumed that they were unzipped to "<tt>C:\GDAL</tt>". |
<li> Unzip the downloaded file into a location of your choice. For the examples below, it will be assumed that they were unzipped to "<tt>C:\GDAL</tt>". |
||
<li> Navigate to the following directory in the unzipped directory "<tt>bin\gdal\apps< |
<li> Navigate to the following directory in the unzipped directory "<tt>bin\gdal\apps</tt>". Following our chosen directory from step 1 this is "<tt>C:\GDAL\bin\apps</tt>". |
||
<li> Copy all the files in the "app" directory into the "bin" directory ("<tt>C:\GDAL\bin</tt>") |
<li> Copy all the files in the "app" directory into the "bin" directory ("<tt>C:\GDAL\bin</tt>") |
||
<li> Create a new folder called "share" underneath the main directory, above the "bin" folder ("<tt>C:\GDAL\share</tt>") |
<li> Create a new folder called "share" underneath the main directory, above the "bin" folder ("<tt>C:\GDAL\share</tt>") |
||
Revision as of 02:08, 12 April 2022
This page describes how to download and install the GDAL programs manually.
Download
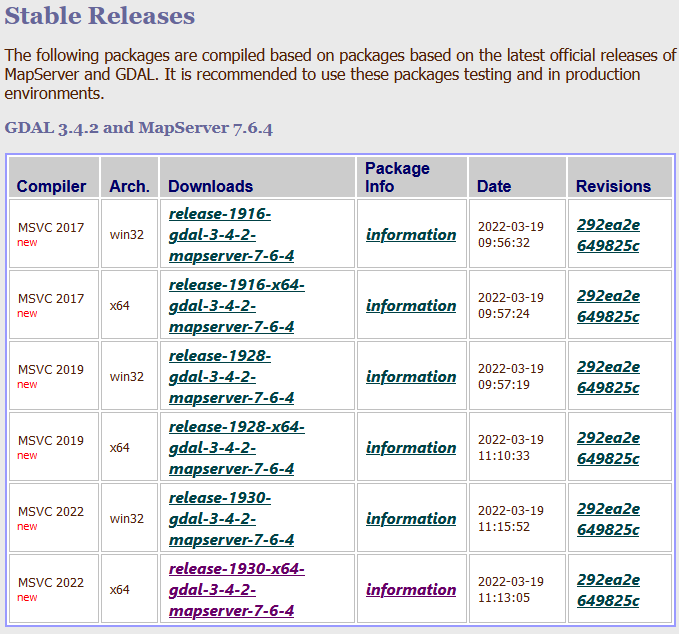
The pre-compiled GDAL programs and other binaries can be downloaded from the following location:
https://www.gisinternals.com/release.php
The page lists many download links:
- Users should choose x64 Arch (architecture) if they are using a x64 bit operating system
- The "MSVC" column is the compiler version. It generally doesn't matter except if you are trying to replicate a previously run GDAL Program results exactly, then you should use the compiler and GDAL version used to produce those results. For format conversion, generally the compiler won't have any affect.
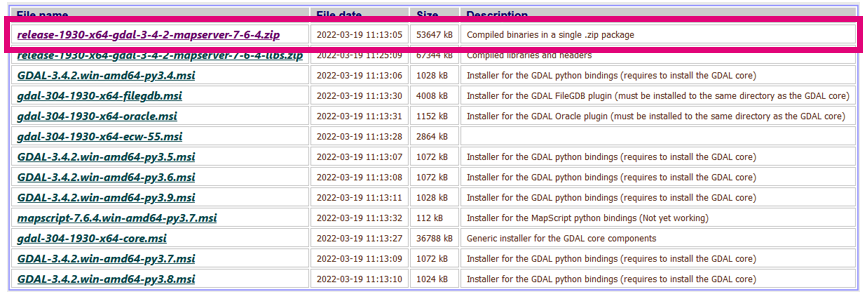
On the next page users should select "Compiled binaries in a single.zip package"
Installation
There is no formal installation process required. The below steps are recommended as it will make running the programs a lot easier without needing to setup custom environment variables:
- Unzip the downloaded file into a location of your choice. For the examples below, it will be assumed that they were unzipped to "C:\GDAL".
- Navigate to the following directory in the unzipped directory "bin\gdal\apps". Following our chosen directory from step 1 this is "C:\GDAL\bin\apps".
- Copy all the files in the "app" directory into the "bin" directory ("C:\GDAL\bin")
- Create a new folder called "share" underneath the main directory, above the "bin" folder ("C:\GDAL\share")
- Create a new folder called "proj" underneath the new "share" folder ("C:\GDAL\share\proj")
- Copy all the files from the "bin\proj7\share" into the newly created "share folder

