MI Selecting Subsets: Difference between revisions
Jump to navigation
Jump to search
Content deleted Content added
Ari Craven (talk | contribs) No edit summary |
Ari Craven (talk | contribs) No edit summary |
||
| Line 5: | Line 5: | ||
<li>Import the 1d_nwk_check.mif layer into MapInfo. </li> |
<li>Import the 1d_nwk_check.mif layer into MapInfo. </li> |
||
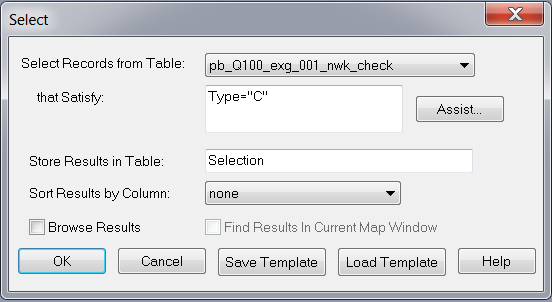
<li>To select all channels of Type “C” (ie. pipes or circular culverts) go to Query, Select… to display the dialog below. Ensure the correct table is selected in the 'Select Records from Table' drop down box. In the dialogue box type the following: Type = "C". Click 'OK'. |
<li>To select all channels of Type “C” (ie. pipes or circular culverts) go to Query, Select… to display the dialog below. Ensure the correct table is selected in the 'Select Records from Table' drop down box. In the dialogue box type the following: Type = "C". Click 'OK'. |
||
</li> |
|||
[[File:Basic Select.png|frame|none]] |
|||
== SQL Select == |
== SQL Select == |
||
Revision as of 15:07, 5 September 2011
Introduction
MapInfo offers two methods for selecting subsets of other tables; the basic 'Select' tool and the more powerful 'SQL select'. This example illustrates how the pipes (Type = “C”) in a 1d_nwk_check.mif layer are selected.
Basic Select
- Import the 1d_nwk_check.mif layer into MapInfo.
- To select all channels of Type “C” (ie. pipes or circular culverts) go to Query, Select… to display the dialog below. Ensure the correct table is selected in the 'Select Records from Table' drop down box. In the dialogue box type the following: Type = "C". Click 'OK'.
