Difference between revisions of "WIBU Configure Cloud Client"
Jump to navigation
Jump to search
(→Method) |
(→Method) |
||
| Line 10: | Line 10: | ||
<br> | <br> | ||
<li>Drag and drop the provided cloud license file from TUFLOW Sales onto the Codemeter Control Centre as shown in the below video:<br> | <li>Drag and drop the provided cloud license file from TUFLOW Sales onto the Codemeter Control Centre as shown in the below video:<br> | ||
| − | {{Video|name=Cloud_License_Drag_And_Drop.mp4|width= | + | {{Video|name=Cloud_License_Drag_And_Drop.mp4|width=1186}} |
<li>The client machine should now be configured to access the network TUFLOW dongle. This can be checked by double clicking on a TUFLOW executable on the client machine. | <li>The client machine should now be configured to access the network TUFLOW dongle. This can be checked by double clicking on a TUFLOW executable on the client machine. | ||
</ol> | </ol> | ||
Revision as of 16:22, 7 February 2024
Introduction
This page contains instructions for configuring a client computer to access a cloud TUFLOW licence. This requires that you have:
- CodeMeter Runtime kit installed on the client machine, see installing CodeMeter Runtime Kit 2016.
- Have been provided with a cloud license file. It will have a '.wbc' file extension. If you do not have this file, please contact sales@tuflow.com
Method
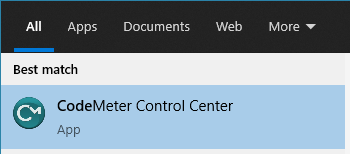
- Open the CodeMeter Control Center via the start menu:

- Drag and drop the provided cloud license file from TUFLOW Sales onto the Codemeter Control Centre as shown in the below video:
- The client machine should now be configured to access the network TUFLOW dongle. This can be checked by double clicking on a TUFLOW executable on the client machine.