Ensight Tips
Introduction
Ensight is 3D Computational Fluid Dynamics result viewing software. This page contains a brief introduction to the software. A number of MapInfo tasks which are repeatedly used in viewing TUFLOW results are described below. If you have any suggestions to be included in these pages, please add them to the discussion page: Ensight Suggestions
Viewing Results
Data Preprocessing
Ensight requires an input file format which is different to the standard TUFLOW output types. RES_to_RES.exe is used to convert TUFLOW xmdf results into an Ensight compatible form. Directions how to do this are outlined here: RES_to_RES.exe
The utility will create the following three ensight file types:
- Ensight case file;
- Ensight geometry file;
- Ensight results files. A unique file is created for each result output variable and time step.
Loading Data
Open the case file (*.case) in Ensight.
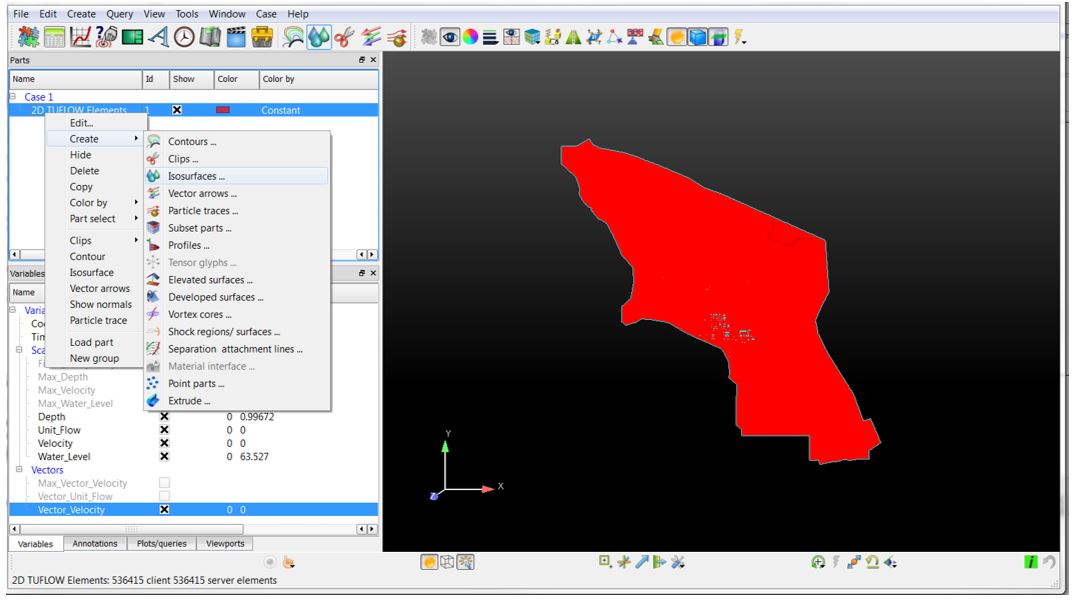
This will load the 'Part' titled: 2D TUFLOW Elements as Case Item 1.
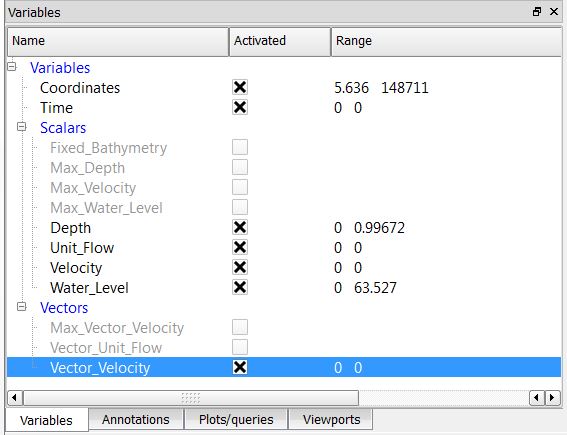
Select the "Variables" tab within the data management window (bottom left) to view the model result scalar and vector datasets that were loaded.
Activate the relevant dataset that you would like to work with. In this example we have selected, Depth, Unit Flow, Velocity and Water Level.
These results can be viewed via creating an isosurface of the dataset within the 2D TUFLOW Elements Case Item.
Right Click 2D TUFLOW Elements Select >> Create >> Isosurfaces
Within the isosurfaces window:
- Select 'Advance' (top right)
- Enter a unique name for the dataset. This will become the part name.
- Select the Variable you would like to visualize
- Set Creation Type = Isovolume
- Set Constraint = Banded
- Define the isovolume range. The upper and lower extreme values for the datasets are listed within the variables table (bottom left of the interface)
Update the variable display by
- Select the newly created part (right click)
- Select Color by >> Select Variable
- Select the relevant maximum dataset. For example, for temporal Depth data, select Max_Depth
Left Mouse Button Holding the left mouse button whilst navigating in the viewport (graphics display)
- Navigating mouse up-down = rotate about horizontal screen X-axis
- Navigating mouse left-right = rotate about vertical screen Y-axis
- Ctrl-key plus up-down or left-right navigation = rotate about Z-axis extending outward from the screen
Right Mouse Button Holding the right mouse button whilst navigating in the viewport (graphics display)
- Navigating mouse up-down or left-right = Model zooms in and out
- Ctrl-key plus right button acts as a pan operation
Middle Mouse Button (Scroll)
- Model zooms in and out
Short-cut Keys
F1 - Window will rotate about the screen X-axis by 45 degrees
F2 - Window will rotate about the screen Y-axis by 45 degrees
F3 - Window will rotate about the screen Z-axis by 45 degrees
Ctrl F1, F2, F3 rotates by -45 degrees about the screen axes
F4 - Spins the window – (try with the left mouse click)
F5 - Front view
F6 - Side view
F7 - Top view
F8 - Will return to last view before F5, F6 or F7 was pressed
F9 - Maximizes the graphics windows on the display; press F9 again or use Esc to go back

