Tute M04 Arc 1D2D Breaklines Archive
Introduction
In this section we will define within the model the elevation of the 2D cells activated by the HX lines we created in the previous step. The elevation of the HX activated cells control the flux between the 1D and 2D domains, and so it is important that the cell elevations reflect the true water level required for flow to cross the HX boundaries.
As we have the HX lines in a 2d_bc format we can add the elevation points in the same format. Alternatively, we could use the 2D Z Shape (2d_zsh) format that was used in module three of the tutorial. If using this format it is important to ensure that a "thick" breakline format is used (by specifying a width greater than 0 and less than 1.5 times the cell size).
To create the breaklines we are going to convert the vertices along the "HX" lines to points and then sample the elevations from the DEM. Another method would be to create a buffer (region) around each of these points and sample for the maximum elevation within the buffer. This method is outlined in the following ArcGIS tip.
Method
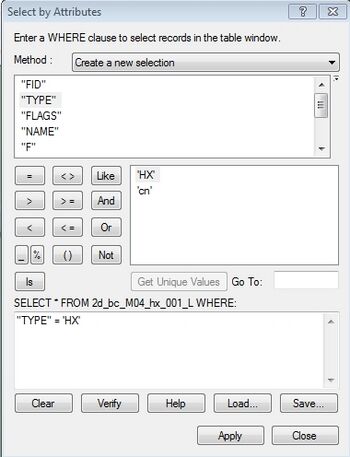
- Select all the "HX" lines from the 2d_bc_M04_HX_001_L layer. To do this use open the attribute table for the layer (right click on the layer in the Table of Contents and select Open Attribute Table. Use the select by attribute option to select all lines with "Type" equal to "HX".
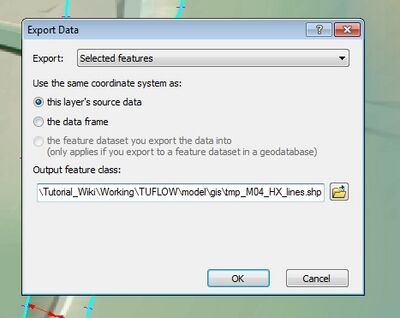
Tip: Select the "TYPE" attribute and select Get Unique Values to get a list of values in the type column. - To create points from these we need to save these as a separate table. This will not be read into TUFLOW and can be deleted at the end of this step. Save the selection as tmp_M04_HX_lines. To export a selection as a new layer in ArcMap, right click on the layer in the table of contents and select Data >> Export Data.
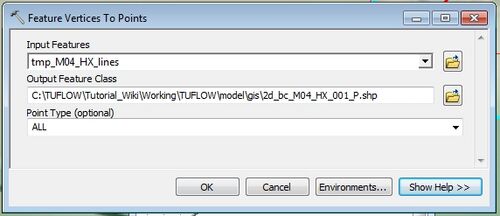
In the export dialogue ensure that export Selected Features is selected. - Next we need to convert the vertices along these lines to points. This process uses the Feature Vertices To Points functionality. To open this select this from the toolbox. This is located under Data Management >> Features >> Feature Vertices To Points. Select the tmp_M04_HX_lines as the input layer (HX lines only). Once again this is a temporary file, set the output name as tmp_M04_HX_pointsand output this to the TUFLOW\model\gis\.
To convert all vertices, use the default All option (alternate options include only the start or end vertices). - Ensure the DEM (DEM_M01) is open.
- Once the points have been created we need to update the "TYPE" attribute to "ZP". This tells TUFLOW that the points contain elevation points. To update the column, use the field calculator to update the "TYPE" attribute for all points to be "ZP". Set the "FLAGS" to blank ("").
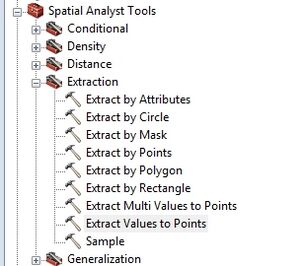
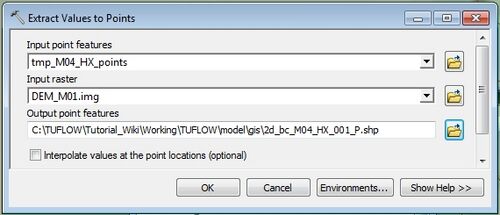
- The next step is to inspect the elevations from the DEM. To do this from the toolboxes select, Spatial Analyst >> Extraction >> Extract Values to Points.
- Set the input layer as the intermediate tmp_M04_HX_points layer containing the points and the input raster as the DEM. Set the the output name as 2d_bc_M04_HX_001_Pand output this to the TUFLOW\model\gis\. This output file will be inputted to TUFLOW.
- For elevation points contained in the 2d_bc format, we need to set the "f" attribute to the DEM column. To update this, open the attribute table, right click on the "f" attribute and select Field Calculator.
- In the dialogue box simply double click on the raster value attribute.
"TYPE" = 'HX'.
Conclusion
The 2d_bc_M04_HX_001_P which contains elevation points for the "HX" line has been created. Please return to the tutorial where the next step is to deactivate the 2D cells in the creek areas.
