Arc Create Projection
Introduction
TUFLOW requires a model projection to be defined. This projection is used for the template files created by TUFLOW and also for all GIS outputs. It is a simple process to create a projection file for use in TUFLOW.
Method
-
This step requires the use of Arc Catalog, as of Arc GIS 10, this can be accessed from ArcMap, for versions prior to this the separate Arc Catalogue program will need to be opened. The method below has been created in ArcMap version 10.
- Within ArcMap, select the Catalog Window icon from the toolbar, see image below.
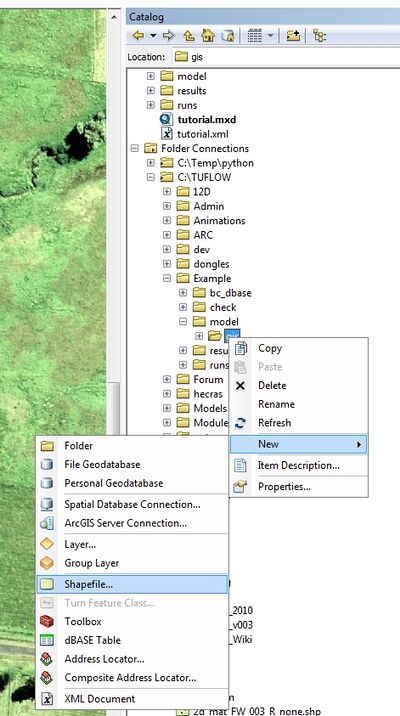
- In the Catalog window navigate to the desired TUFLOW\model\gis\ folder, right click on this and select New >> Shapefile.
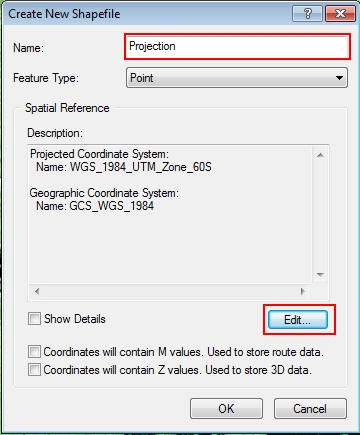
- Name the file, typically this is called simply Projection, however, this can be modified if desired.
- In the Spatial Reference section select Edit and then select the desired projection.
TIP: For the TUFLOW tutorial model the correct projection is: Projected Coordinate Systems >> UTM >> WGS 1984 >> WGS 1984 UTM Zone 60S.prj - The projection file is now ready for use in TUFLOW. This is read into the .tcf with the below command:
SHP Projection == ..\model\gis\Projection.prj


| Up |
|---|