Tute M04 MI 1d nwk Archive
Jump to navigation
Jump to search
Introduction
In this section we create the 1D channels. For this tutorial a number of completed channels are provided as a guide. If this was not provided, the method would be to import the "1d_nwk_empty.mif" file from the TUFLOW\model\mi\empty folder and save this in the TUFLOW\model\mi directory and begin the edits in this layer.
Method
- Ensure the cross-section layer is open.
- Copy the 1d_nwk_M04_channels_001 and 1d_nwk_M04_Culverts_001 files from the Module_Data\Module_04\ folder and into the TUFLOW\model\mi\ folder you are working in. Open the both files in MapInfo.
- Add these layer to the map window and make the 1d_nwk_M04_channels_001 layer editable. TIP: To avoid editing or snapping to the previous version it is recommended that you close the 1d_nwk_M02_culverts_001.tab version, if it is open.
- In order to make the snapping to the cross-sections easier make the vertices on the cross sections visible. To do this right click on the layer in the layer control window and select "properties", in the window select Show Node. Showing nodes was used in module 1 to snap the external boundary.
- Ensure that snapping is enabled by toggling the "S" key.
- Zoom in to the south western edge of the model, where the main inflow occurs.
- Digitise a polyline from the end of the channel provided, along the creek centreline, and double click on a vertex of the next cross-section downstream to finish the channel segment. Each channel (from cross-section to cross-section) is required to be a separate line object. Don't fill in the GIS attributes yet, we will fill these out at the end. Tip: Using a line style with an arrow at the end of the line makes it easy to see where one channel ends and the next begins.
- At the location of the 1st culvert (in the 1d_nwk_M04_culverts_001) we need to ensure that the channel snaps to the layer upstream of the culvert. At the downstream end of the culvert, ensure that start of the open channel is snapped to the end of the culvert. In these locations there are three layers snapped together: the culvert, channel and cross-section.
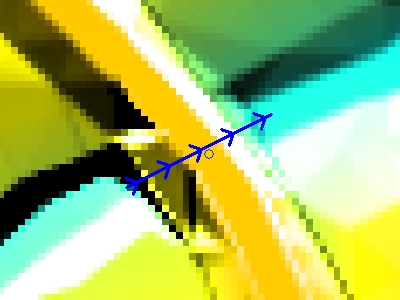
- The first two sections downstream of the channel have been digitised in the layer provided. In this area there is an alternative flow path over a meander in the channel. A weir channel has been digitised in the layer provided. We need to connect this up to the main channel. Digitise a line from the junction of the channels to the upstream end of the weir, as shown in the image below.
- Enter "X" into the GIS attribute Channel_Type. This "X", or channel connector, connects the channels together but indicates that the weir is not the main channel path.
- At the downstream of the weir, enter another channel connector.
- Continue digitising channels between the cross-sections. At the second culvert, ensure you snap to each end of the culvert. At the downtstream of the model, snap to the channel provided in the layer.
- Once all the the channel lines have been drawn we will update the GIS attributes. The first thing we need to do is select only the channels that do not have any properties set. The channels provided as part of the module data already have the correct attributes. To select the channels without a Channel Type assigned, we will use the select function in MapInfo. To access this select Query >> Select from the menu.
- Select 1d_nwk_M04_chanel_001 from the drop down dialogue. Select Assist and then enter the search query as Channel_Type="". Press Ok to complete the selection.
- This should open a new browser window with the newly created items.
- We can now update this selection. To do this select Table >> Update Column from the menu items. In the update dialogue set the Table to Update to the last item, this is the newly created selection. If no other queries have been performed this will be called Query1. Set the Column to Update to Channel_Type. In the Value option set this to "S". Uncheck the Browse Results tick box (if you leave this checked a new browser window will be opened as Query2.
This step has updated all channels not yet assigned as the "S" type, which is the standard type of open channel. - Repeat the update process to update the Use_Chan_Storage_at_Nodes to "T". This tells TUFLOW to automatically calculate the storage at the nodes (ends of the channel) based on the cross-sectional properties and the channel length.
- Update the Mannings_n to 0.09 (don't use quotes because this is a numerical field). Set the Upstream_Invert and Downstream_Invert to -99999.
- To avoid assigning a channel name to each of these channels we will also use the update function to do this automatically. Use the process above to update the ID column of the query table. In the Value enter "FC1_"+format$(rowid,"000"). This includes the creek ID - FC1 and then adds a unique row number. As these were digitised from upstream to downstream, this value should be in increasing order from upstream to downstream.
- Save the 1d_nwk_M04_channels_001 file and export to .mif format for import into TUFLOW. The open channel is now ready for input into TUFLOW. In Tutorial Module 2 we created a number of 1D/2D links for the culverts. We did this in a number of ways, one of these was to create the link using a 1d_nwk layer (link to Module 2). Now that we are modelling the entire creek in 1D we need to remove these. The 1D open channel and the 1D culverts are connected already based on their snapping. To remove the 1D/2D connections for the culverts, please follow the steps below:
- Make the 1d_nwk_M04_culverts_001 editable.
- Select the nodes at the upstream and downstream of the culvert and delete these.
Before deletion

After deletion
- Save the 1d_nwk_M04_culverts_001 file and export to .mif format for import into TUFLOW.


Conclusion
The 1D network layers are now ready for input into TUFLOW. Please return to the tutorial where the next step is to define the 1d/2d connections.