MapInfo Style Check Files
Introduction
This page introduces some MapInfo styles and concepts that are useful in viewing results files.
Thematic Mapping
Thematic mapping can be used to change the visualisation style of objects based on the attribute value. In the examples below, we will style a grid check file based on the Material ID (region object with unique values) and also a 1d_hydroprop file based on the conveyance.
Example Mapping Materials from _grd check
This example will demonstrate visualising of the “Material” attribute. This check is necessary for the majority of models to ensure that land uses have been assigned appropriately. This is of particular importance where multiple 2d_mat layers have been read into the .tgc file using the Read GIS Mat == or Read Grid Mat == commands. It may also be necessary to ensure that a continuous row of cells has been achieved for features representing a flowpath through the study area, such as drains that have been modelled in 2D, or roads within urban areas.
- Ensure that the _grd_check file has been loaded into MapInfo, and is loaded into the Layer Control of the current map window.
- Select the Create Thematic Map option from the Map drop-down menu. Then select the Individual Type (on the left) and then choose any of the template colour palettes for a Region layer, and select Next.
- In the next dialogue, set the table as the _grd_check file and the field (attribute to map as Material.
- After selecting Next, the dialogue box will display the number of cells found within the _grd_check layer and the colour that has been assigned to each unique Material ID. The styles can be changed at this step if desired.
- Selecting OK will revert back to the original Map Window where the Thematic Map has been added as another layer. The layer displays the colour-coding that has been applied to each cell within the _grd_check file making it much easier to differentiate between land uses. The grd_check file can then be reviewed by overlaying aerial photography or mapping and cross-checking with the Materials Definition File (Read Materials File == to determine the bed resistance value correlating to each Material ID.
Tip: the styles can be changed by double clicking on the thematic layer in the Layer Control.


Example Mapping 1D _TSMB.mif Layer (To Diagnose Instability Locations)
- In MapInfo, import the _TSMB.mif layer (Mass Balance Output must have been set to ON (the default) and the file is written to the .ecf Output Folder).
- Go to Map > Create Thematic Map…, choose Varying Ranges and one of the point style options as in the dialogue below:
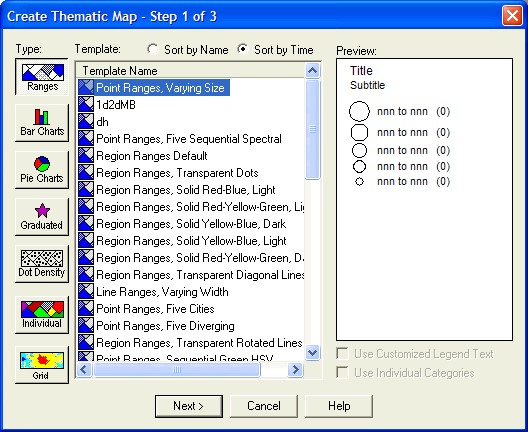
- Click Next and select the _TSMB layer and the ME_Avg_Abs attribute. The Ignore Zeros or Blanks can be ticked (zero mass error is not we are looking for!). Click Next.
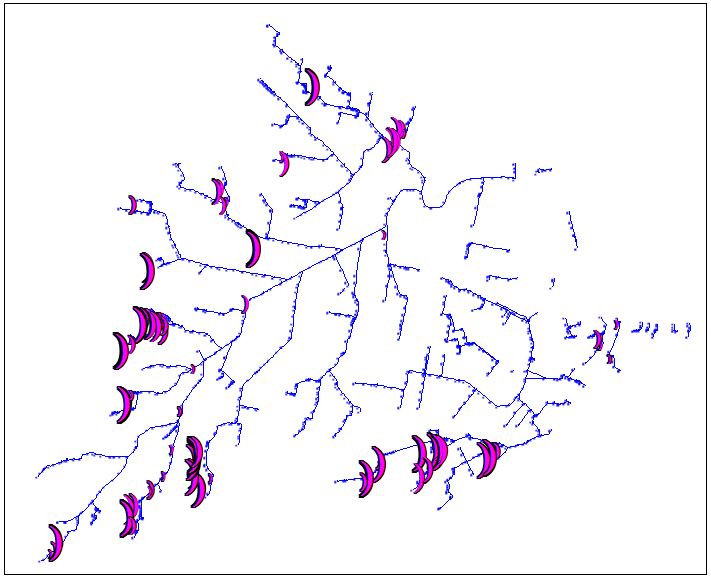
- Use the various options in the last dialogue to change the styles, ranges, etc. and click OK. It is worthwhile having your GIS specialist to explain all the different options for thematic mapping so as to fully utilise the power of this feature. The figure below illustrates an example of thematically mapping problematic 1D nodes in a large 1D/2D model during the process of reviewing and fine-tuning the model during its development. The larger the object the greater the mass error at those locations.


| Up |
|---|