Tute M01 Inspect Zpts Arc Archive
To confirm the delete was successful, click the info tool on one of the Zpts, the elevation field should now been removed:
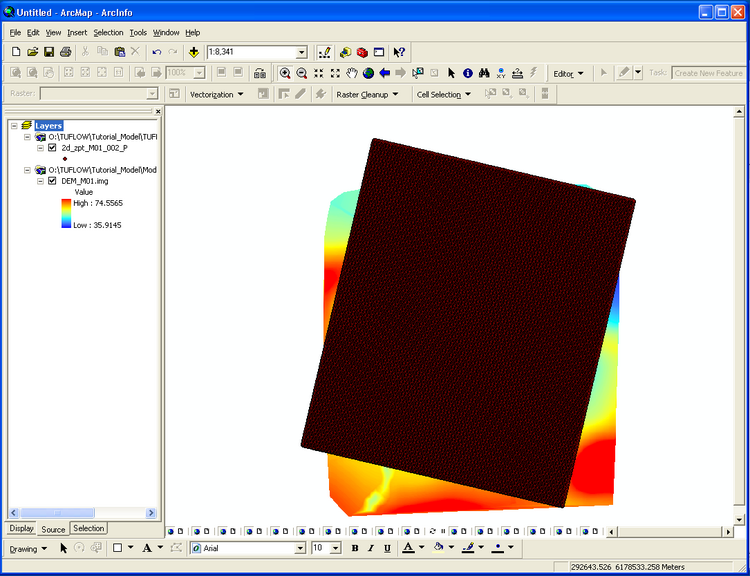
- Open the blank Zpt layer 2d_zpt_M01_5m_002_P.shp, this was written in the TUFLOW\Model\shp\ directory. The Zpts will appear as a mass of points when zoomed to the full extent.
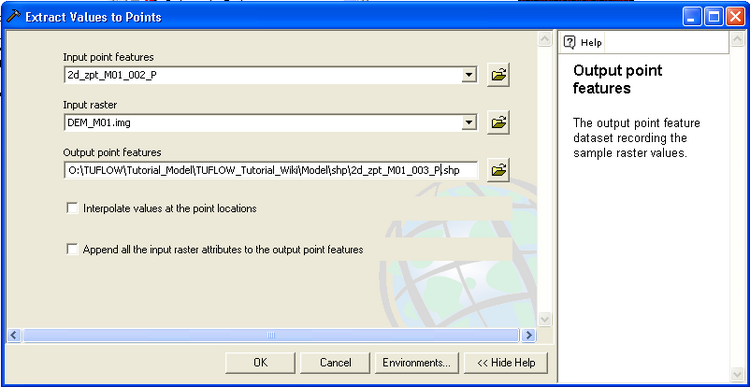
- Open the Arc Toolbox (select Window >> Arc Toolbox), from the menu choose Spatial Analyst Tools >> Extraction >> Extract Values to Points.
- Set the input point features to 2d_zpt_M01_5m_002_P
- Set the Input raster to DEM_M01.img
- Set the output point features to the TUFLOW\model\shp\ and the file name to 2d_zpt_M01_5m_003_P.shp
- Select Ok.
- Make the newly created 2d_zpt_M01_5m_003_P.shp editable by selecting Editor >> Start Editing.
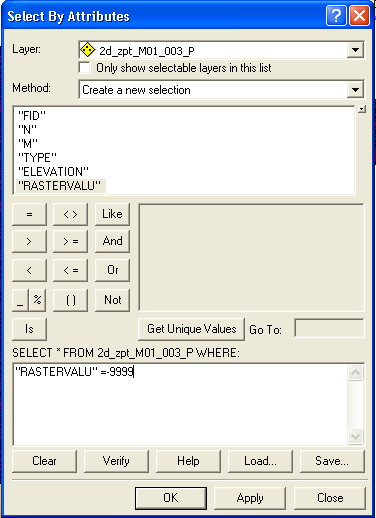
- Select the null values, by using the menu item. Selection >> Select by Attributes. Select where "RASTERVALU" =-9999. Select Apply.
- Delete the selected items by hitting the delete key (or using Edit >> Delete).
- Stop editing, by selecting Editor >> Stop Editing and when prompted save the files. The Zpts outside the DEM area should now be removed as per the image below, ensure that the 2d_zpt_M01_5m_002_P(superseded) layer is removed or not visible.
Introduction
In this page we look at the process on assigning elevations to the TUFLOW Zpts that define the elevations in the model. To do this open ArcGIS and open the DEM, which is provided as part of the Module Data and is named DEM_M01.img. Alternatively a layer file the DEM_M01.img.lyr file can be opened, this opens the same DEM, but with the specific colouring properties shown below.
Method

A dialogue will be displayed while the extraction is being processed, this may take a few seconds. Once completed, clicking the info tool on one of the updated Zpts within the DEM area should now show an additional data attribute, as per the image below:
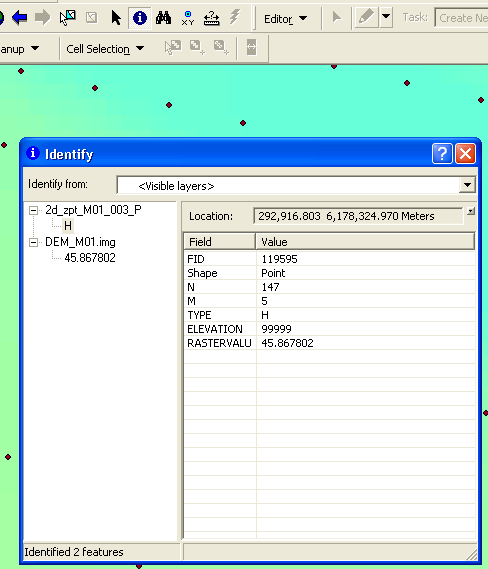
ArcGIS has adding a new data column to the which it has inspected from the DEM. The Zpts that are outside of the DEM have been assigned a value of -9,999 values. We need to remove these points, to do this:
The inspection process created a new data column, however, TUFLOW requires the elevation data to be in the fourth column. There are two ways of overcoming this:
- Updating the fourth (elevation) attribute column to have the values of the newly created (RASTERVALU) attribute.
- Remove the elevation column, so that the RASTERVALU column becomes the fourth column.
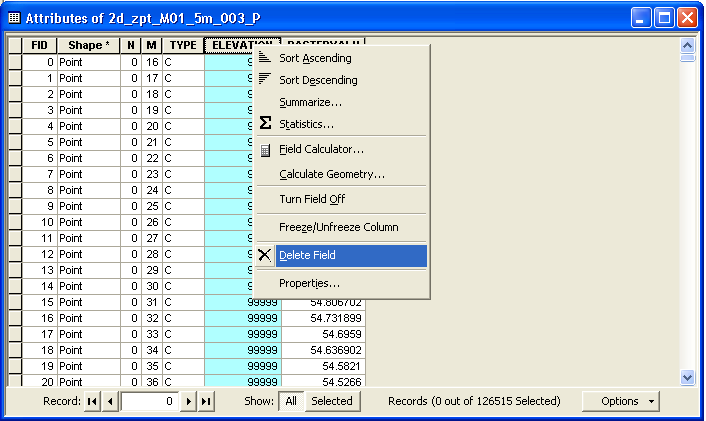

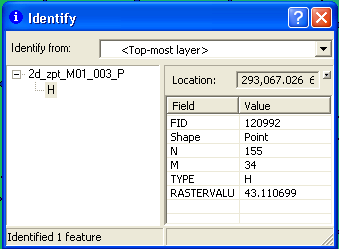
Read RowCol Zpts == ..\model\shp\2d_zpt_M01_5m_003_P.dbf
Conclusion
The Zpts have been inspected from the DEM, the geometry control file (.tgc) updated to use the inspected Zpts. Please return to the tutorial model module 1 page where the next step is to define the active areas.