Tute M01 Materials Arc Archive
Introduction
This page details the method for using ArcMAP to create the GIS based material types (land use areas). Once the GIS layers are setup (in this section), surface roughness or bed-resistance values (e.g. Manning's n) are assigned to each of these land use areas (in the main tutorial module, here).
The Module_Data\Module_01\Arc\ folder already contains the materials files that we will use.
Method
- Open the aerial photo from the Module_Data\Aerial_Photos\Arc\Aerial_Photo_M01.jpg
- Copy the 2d_mat_M01_002_R files from the Module_Data\Module_01\Arc\ directory to TUFLOW\Model\gis\. There should be four (4) files, with the extensions dbf, prj, shp and .shx.
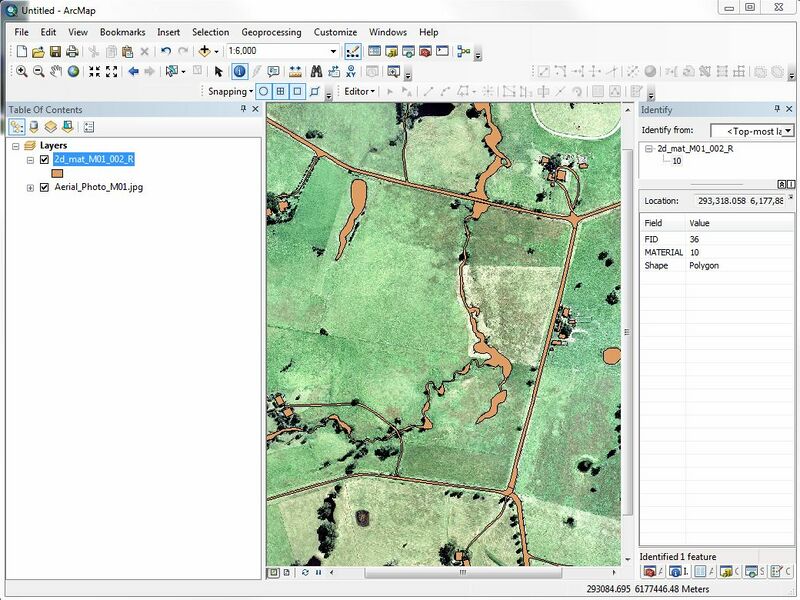
- Add the TUFLOW\Model\gis\2d_mat_M01_002_R.shp file in ArcMap. The screen should look something like the image below (by default in ArcMAP all the objects will have the same style).
- Each of the regions contain an integer value that defines the land use type. To make this more obvious in ArcMap, we can update the colour using the attribute. To do this
- Right click on the 2d_mat_M01_002_R in the Table of Contents and select Properties.
- In the Layer Properties dialogue, select the Symbology tab.
- Select the Categories >> Unique Values option in the left hand pane.
- Select Add All Values to populate the material values.
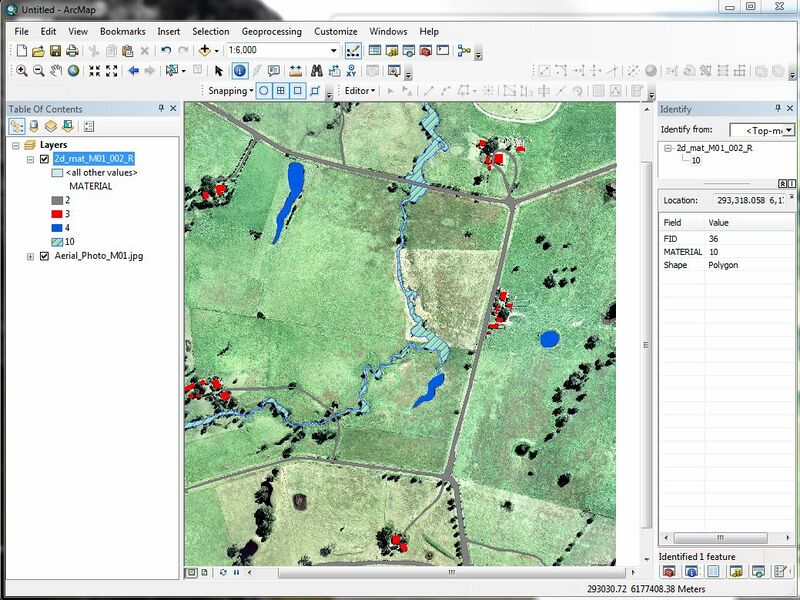
- Assign a unique colour to each of the material IDs (2, 3, 4 and 10).
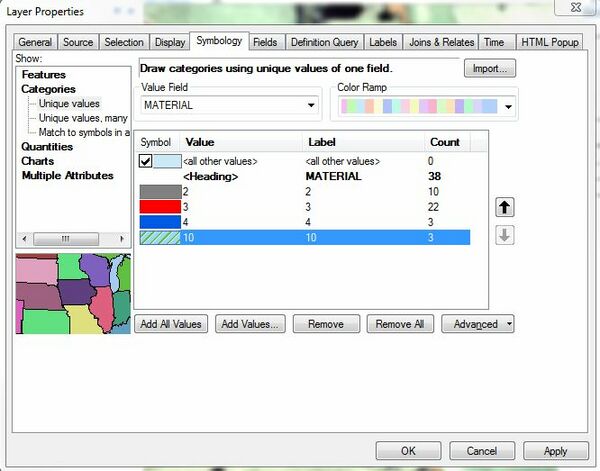
- Select Apply
TIP: To save this colour style, right click on the 2d_mat_M01_002_R in the Table of Contents and select Save As Layer File. Save the layer with the same name as the shapefile (this is the default). When you load the data in the future, if you load the layer file (.lyr) the colouring will be preserved.
You may notice that the open pasture land-use that covers most of the study area has not been defined. This will be our default land use type, to save time we only need to define the areas where the land use differs from the default.
NOTE: The material attribute associated with each polygon is an integer number specific to a type of land-use. In the next step we link the material ID (integer) to a roughness coefficient. A table is provided below for reference.
Material ID Land Use Manning's n 1 Pasture 0.06 2 Roads 0.022 3 Buildings 3.0 4 Ponds and other water 0.03 10 Vegetated Creek 0.03


Alternatively If you would like to create your own material inputs rather than using the supplied dataset.
- Load the empty (template) file named 2d_mat_empty_R.shp from TUFLOW\Model\gis\empty\and save this in the TUFLOW\model\gis\ folder as as 2d_mat_M01_002_R.shp, add this to a map window with the aerial photo and edit the shape, digitise your own material polygons ensuring to assign a Material ID to each polygon using the land use types in the table above.
TUFLOW Geometry Control File Updates
In order to read in the GIS layer created above. Enter the following text into the TGC file:
Set Mat == 1 ! Set every cell to a material ID of 1 (Pasture)
Read GIS Mat == gis\2d_mat_M01_002_R.shp
The Set Mat command sets all 2D cells to a Material ID of 1, which is used for pasture. The Read GIS Mat command updates any 2D cells that fall within the polygons in the 2d_mat layer with the Material attribute value of each polygon. As discussed for the cell code values in the previous section, the order of these Mat commands is important.
Conclusion
ArcMap has been used to view or create a 2d_mat layer which defines the spatial extents of the land use categories. Material commands have been added to the TGC. Please return to Tutorial Module 1.