Difference between revisions of "QGIS SWMM GeoPackage Create"
Jump to navigation
Jump to search
(Created page with "== Introduction == == Usage == This tool can be found in the QGIS processing toolbox panel under 'TUFLOW > SWMM'. To open the Processing Toolbox Panel, navigate to 'Processi...") |
|||
| Line 1: | Line 1: | ||
== Introduction == | == Introduction == | ||
| − | + | This tool creates a SWMM GeoPackage file. The tool allows the user to choose which input layers to populate the file with. The formatting works with the TUFLOW-SWMM tools for writing SWMM inp files. | |
| + | It is recommended to use this tool when creating the SWMM GeoPackage file to avoid potential future errors when using other TUFLOW-SWMM tools. | ||
== Usage == | == Usage == | ||
Revision as of 10:16, 7 December 2023
Introduction
This tool creates a SWMM GeoPackage file. The tool allows the user to choose which input layers to populate the file with. The formatting works with the TUFLOW-SWMM tools for writing SWMM inp files. It is recommended to use this tool when creating the SWMM GeoPackage file to avoid potential future errors when using other TUFLOW-SWMM tools.
Usage
This tool can be found in the QGIS processing toolbox panel under 'TUFLOW > SWMM'. To open the Processing Toolbox Panel, navigate to 'Processing' in the menubar and select 'Toolbox'.

Parameters
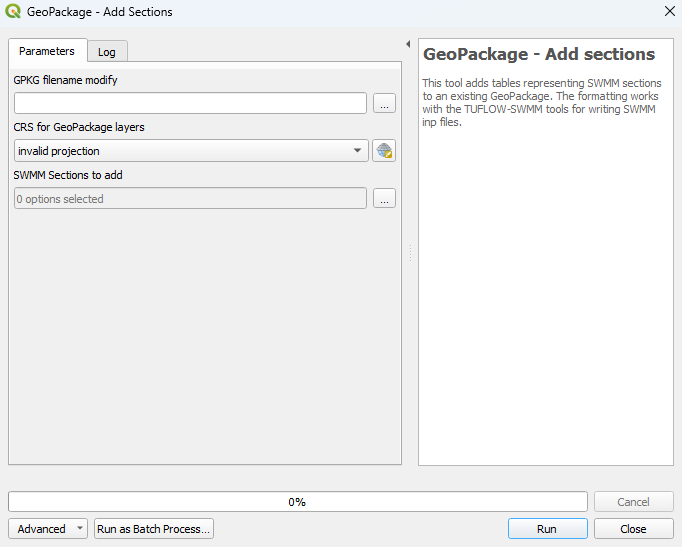
- GPKG filename modify: Select the ... button to bring up a dialogue and then navigate to the location of the GeoPackage to modify.
- CRS for GeoPackage layers: Select the CRS (Coordinate Reference System) by either the drop down menu, or by selecting 'Select CRS' [photo] and using the CRS Selector.
- SWMM Sections to add: Select the ... button and tick on the SWMM sections to add to the GeoPackage.
Example
| Up |
|---|
