Difference between revisions of "QGIS SWMM Junctions Set Attributes"
| Line 18: | Line 18: | ||
<li>'''Input BC Connection Layers [optional]:''' The BC connection layer(s) that connect the node(s) to the 2D domain.<br> | <li>'''Input BC Connection Layers [optional]:''' The BC connection layer(s) that connect the node(s) to the 2D domain.<br> | ||
<li>For information on the other input parameters, refer to the <u>[[QGIS SWMM Junctions Set Attributes#Recommended Settings|Recommended Settings]]</u> section. | <li>For information on the other input parameters, refer to the <u>[[QGIS SWMM Junctions Set Attributes#Recommended Settings|Recommended Settings]]</u> section. | ||
| − | <li>'''JunctionAtts:''' Determines the output | + | <li>'''JunctionAtts:''' Determines the location and filename of the output file. Details on the options are below. |
</ol> | </ol> | ||
| − | '''Note:''' If 'Edit Feature In-Place' is selected, the tool does not require the 'Input layer' or the 'JunctionAtts' parameters as the tool will | + | '''Note:''' If 'Edit Feature In-Place' is selected, the tool does not require the 'Input layer' or the 'JunctionAtts' parameters as the tool will override the existing junctions file with the updated attributes. |
<br><br> | <br><br> | ||
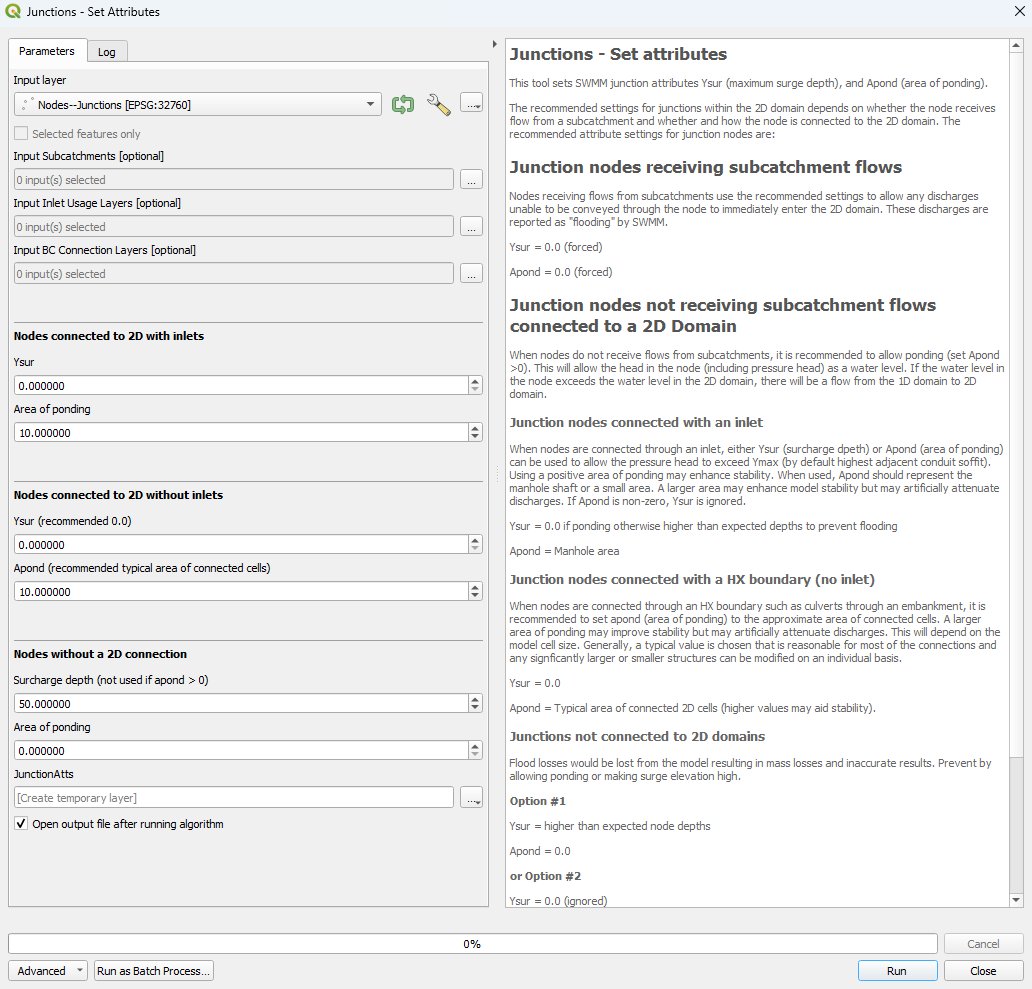
[[File:set_attributes_dialog.png]] | [[File:set_attributes_dialog.png]] | ||
<br><br> | <br><br> | ||
| − | '''Output Options:'''<br> | + | :'''Output Options:'''<br> |
| + | :For each of the following options, the tool will create a new junctions layer and won't override the existing one. <br> | ||
| + | <ol> | ||
<br> | <br> | ||
| − | ::[[File: | + | [[File:set_attributes_output_options.png]] |
| + | <br><br> | ||
| + | :<li>Create Temporary Layer: | ||
| + | :*Creates a temporary scratch layer. This layer will open into the QGIS workspace but it will '''not''' be saved anywhere. | ||
| + | :<li>Save to File...: | ||
| + | :*The user can navigate to a folder and save the updated junctions layer to a new GeoPackage Database. | ||
| + | :<li>Save to GeoPackage...: | ||
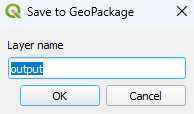
| + | :*The user can navigate to an existing GeoPackage Database. Once selected, a 'Layer Name' dialog will appear. Enter the new layer name, and the updated junctions layer will be saved as that name in the GPKG. | ||
| + | ::[[File:Layer_Name_dialog.png]] | ||
| + | :<li>Save to Database Table...: | ||
| + | :*'''<font color=red>???</font>''' | ||
| + | :<li>Append to Layer...: | ||
| + | :*'''<font color=red>???</font>'''<br> | ||
| + | </ol> | ||
<br> | <br> | ||
| − | |||
| − | |||
| − | |||
| − | |||
| − | |||
| − | |||
| − | |||
| − | |||
| − | |||
| − | |||
| − | |||
| − | |||
=== Recommended Settings === | === Recommended Settings === | ||
Revision as of 13:38, 14 December 2023
Introduction
This tool sets SWMM junction attributes Ysur (maximum surge depth), and Apond (area of ponding). The junction attributes are set based on generic rules and individual nodes may need to be modified.
This tool supports in-place editing if selected in the QGIS processing window.
Usage
This tool, Junctions - Set Attributes, can be found in the QGIS processing toolbox panel under 'TUFLOW > SWMM'. To open the Processing Toolbox Panel, navigate to 'Processing' in the menubar and select 'Toolbox'.

Parameters
- Input layer: The junctions layer that will be updated. To only update the attributes of some of the layers' features, tick on 'Selected features only'. The tool will only update the attributes of the junctions which have been selected.
- Input Subcatchments [optional]: The subcatchments layer(s) that the node(s) receive flow from.
- Input Inlet Usage Layers [optional]: The input inlet usage layer(s) that the node(s) are connected to.
- Input BC Connection Layers [optional]: The BC connection layer(s) that connect the node(s) to the 2D domain.
- For information on the other input parameters, refer to the Recommended Settings section.
- JunctionAtts: Determines the location and filename of the output file. Details on the options are below.
Note: If 'Edit Feature In-Place' is selected, the tool does not require the 'Input layer' or the 'JunctionAtts' parameters as the tool will override the existing junctions file with the updated attributes.

- Output Options:
- For each of the following options, the tool will create a new junctions layer and won't override the existing one.
- Create Temporary Layer:
- Creates a temporary scratch layer. This layer will open into the QGIS workspace but it will not be saved anywhere.
- Create Temporary Layer:
- Save to File...:
- The user can navigate to a folder and save the updated junctions layer to a new GeoPackage Database.
- Save to File...:
- Save to GeoPackage...:
- The user can navigate to an existing GeoPackage Database. Once selected, a 'Layer Name' dialog will appear. Enter the new layer name, and the updated junctions layer will be saved as that name in the GPKG.
- Save to GeoPackage...:
- Save to Database Table...:
- ???
- Save to Database Table...:
- Append to Layer...:
- ???
- Append to Layer...:

Recommended Settings
The recommended settings for junctions within the 2D domain depends on whether the node receives flow from a subcatchment and whether and how the node is connected to the 2D domain. The recommended attribute settings for junction nodes are:
Note: It is recommended that Ymax be set to 0.0 for all junctions. SWMM will set Ymax to highest soffit of connected conduits.
Junction nodes receiving subcatchment flows:
The recommended settings allow any discharges unable to be conveyed through the node to immediately enter the 2D domain. These discharges are reported as "flooding" by SWMM.
- Ysur = 0.0 (forced)
- Apond = 0.0 (forced)
Junction nodes not receiving subcatchment flows:
It is recommended to allow ponding (set Apond >0). This will allow the head in the node (including pressure head) as a water level. If the water level in the node exceeds the water level in the 2D domain, there will be a flow from the 1D domain to 2D domain.
- Junction nodes connected to 2D with an inlet:
- When nodes are connected through an inlet, either Ysur (surcharge depth) or Apond (area of ponding) can be used to allow the pressure head to exceed Ymax (by default highest adjacent conduit soffit). Using a positive area of ponding may enhance stability. When used, Apond should represent the manhole shaft or a small area. A larger area may enhance model stability but may artificially attenuate discharges. If Apond is non-zero, Ysur is ignored.
- Ysur = 0.0, if ponding otherwise higher than expected depths to prevent flooding.
- Apond = Manhole area
- Junction nodes connected to 2D with a HX boundary (no inlet):
- When nodes are connected through an HX boundary such as culverts through an embankment, it is recommended to set Apond (area of ponding) to the approximate area of connected cells. A larger area of ponding may improve stability but may artificially attenuate discharges. This will depend on the model cell size. Generally, a typical value is chosen that is reasonable for most of the connections and any significantly larger or smaller structures can be modified on an individual basis.
- Ysur = 0.0
- Apond = Typical area of connected 2D cells (higher values may aid stability).
- Junctions not connected to 2D domains:
- Flood losses would be lost from the model resulting in mass losses and inaccurate results. Prevent by allowing ponding or making surge elevation high.
- Option #1:
- Ysur = higher than expected node depths
- Apond = 0.0
- or Option #2:
- Ysur = 0.0 (ignored)
- Apond = (positive number)
Example
| Up |
|---|
