Tute M01 GIS Based Zpt Inspection Archive
Introduction
This page details the GIS based inspection of Zpts, this is an alternative to the direct input of the elevation model described in the module 1 tutorial model. This approach is described in the following software packages:
- MapInfo with Vertical Mapper
- MapInfo with Encom Discover
- ArcGIS with Spatial Analyst
- Quantum GIS (QGIS)
Method
-
To inspect the Zpts in your GIS package, follow these steps.
- To set all 2D cells within the domain as active cells (the default is that a 2D cell is inactive), enter the following line of text in the TGC file. Active cells are cells that can wet and dry. Zpts are only created for active cells, hence the need to make all cells active. Set Code == 1
- To create a GIS layer of the Zpts and then stop TUFLOW enter the following lines of text into the TGC file after the existing commands. The Write GIS Domain command is optional, but is useful to create a GIS layer showing the extent of the 2D domain for checking purposes.
For MapInfo use the following commands:
Write GIS Zpts == mi\2d_zpt_M01_5m_002.mif
Write GIS Domain == ..\check\2d\2d_dom_check_M01.mif
For ArcGIS or QGIS use the following commands:
Write GIS Zpts == gis\2d_zpt_M01_5m_002.shp
Write GIS Domain == ..\check\2d\2d_dom_check_M01.shp
- Add the following command to tell the TUFLOW simulation to stop after writing the zpt and domain files:
STOP - Save the TGC file. Before running TUFLOW again to create the Z points, the TGC file needs to be linked to the TCF file.
- Copy the M01_5m_001.tcf file as M01_5m_002.tcf
- Tip: In the text editor use File, Save As…
- Enter the following line of text into the TCF file. Enter an exclamation mark before the Write Empty MI Files command (or delete it) so TUFLOW now ignores this command. Save the TCF file. Geometry Control File == ..\model\M01_5m_002.tgc
- Also add the following lines to the TCF file so as to redirect output to the runs and log folders. Log Folder == Log
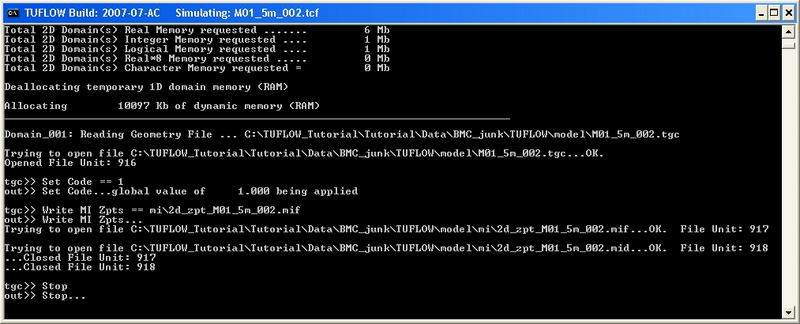
- Run TUFLOW again in the same manner as described earlier. The Console window should appear and once finished, it should look something like the image below. Click on OK of the message dialog box that appears to close the Console window.
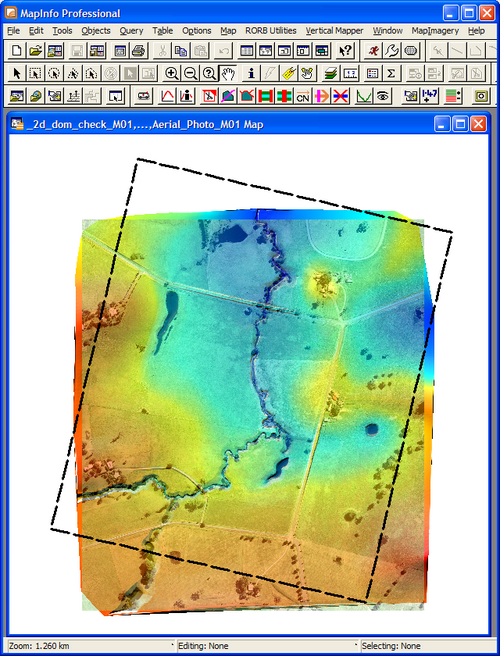
- Import the 2d_dom_check_M01 file from the tuflow\check\2d folder into your GIS package and ensure that it is visible, with the aerial photo or Digital Elevation Model (DEM) also visible the location should be as shown below.
- Assign Elevations to the Zpts. Once we have reviewed the 2D domain area is in the correct location and covers the area to be modelled we need to set the elevations in the 2D model by inspecting the Zpts. A basic description of the Zpts is in the Zpt description page. Elevations can be assigned to the Zpts in a number of ways, the tutorial model covers the following methods:
Output Folder == ..\results\M01\2d ! output results to this folder
Write Check Files == ..\check\2d\ ! write check files to this folder (ensure there is a “\” as the last character)

